Seven and a half years ago, I let readers into my world of meal prep.
We basically meal prep what we eat later in the day, the week or the month in a few batches. In this way, we are able to control what we eat and save time.
My old post was really comprehensive, and many have feedback that the detail allows them to contrast against their cook or reduce the mental challenge of starting.
You can read the post here: Frugal Life: How do I Meal Prep for 7 Days Lunch in Half a Day in Singapore
That article was written so long ago. Almost a year before my mom passed away.
I thought it was time to update you on why I jumped back on the bandwagon and what I did.
If you are more into frugality, value eats, and less about investing, this article may be for you.
This article is long because it would be better to be more detail and instructional. This might not be your cup of tea.
Learning to Prepare A “Go-To” Meal that I Would Look Forward to Eating.
When my dad passed away, I encountered a few realisations early on, and one of them was that I got to find food on my own.
Finding food is not a big problem since I am a 43-year-old big boy with ample experience buying food on my own. My parents’ legacy tends to be less tangible. Instead of endowing me with a lot of money, they just want to make sure I can take care of myself. And one of the thing parents constantly worry about our well being.
Now that they are not around, I got to figure out how to take care of myself. As busy people, we can always dabao food from the usual places.
I tried that for a while but I realize something. How come most of the dishes that are available in food centres have so few vegetables? For sure, they come with enough meat, but it is so damn difficult to find veggies.
So we got to go and eat salad or…. mixed vegetable store. Or what we call Cai Png.
Some of my colleagues would tease me about eating Cai Png every day but fail to realize that… if you need enough veggie, how the fxxk you get it in other food? Wanton mee? Chicken rice?
I could continue to eat Cai Png all the way but there is one problem: The Cai Png at Tanjong Pagar/Outram around Providend/Havend is okay and good price but the cai png at SengKang is soooooooo limited in choices and not cheap.
Suddenly, I remember my meal prep day and wonder how much of that meal prep will match what I one to achieve today.
My motivations may be framed in the diagram below:

:
- Wellness. I want to be able to control, to a certain degree, some staple intake of vegetables. By prepping, I can also be kinda sure what goes into my body.
- Convenience. If I do this, it takes away time for other things. So the time spend needs about acceptable for me.
- Mindlessness. A big motivation is that if I can successfully fulfill the Sweet Spot in the vein diagram, it frees up a lot of mental capacity.
- Price. Let us try to see whether we can make it affordable.
If I can consistently have a meal that I do not feel guilty about not eating something else, easy to prepare and most of all, something that I can often look forward to eating, then that would be the perfect situation.
Okay, so here is my meal prep.
What Do I Usually Prepare?
I decided that I would eat two meals a day mainly:
- If I make the two meals quite satiating, and I feel full enough, then that is good enough.
- I will prep the two meals to be eaten five times a week, which will coincide with the weekdays when I go to work.
- I will prepare the meat to be there every day instead of just five days.
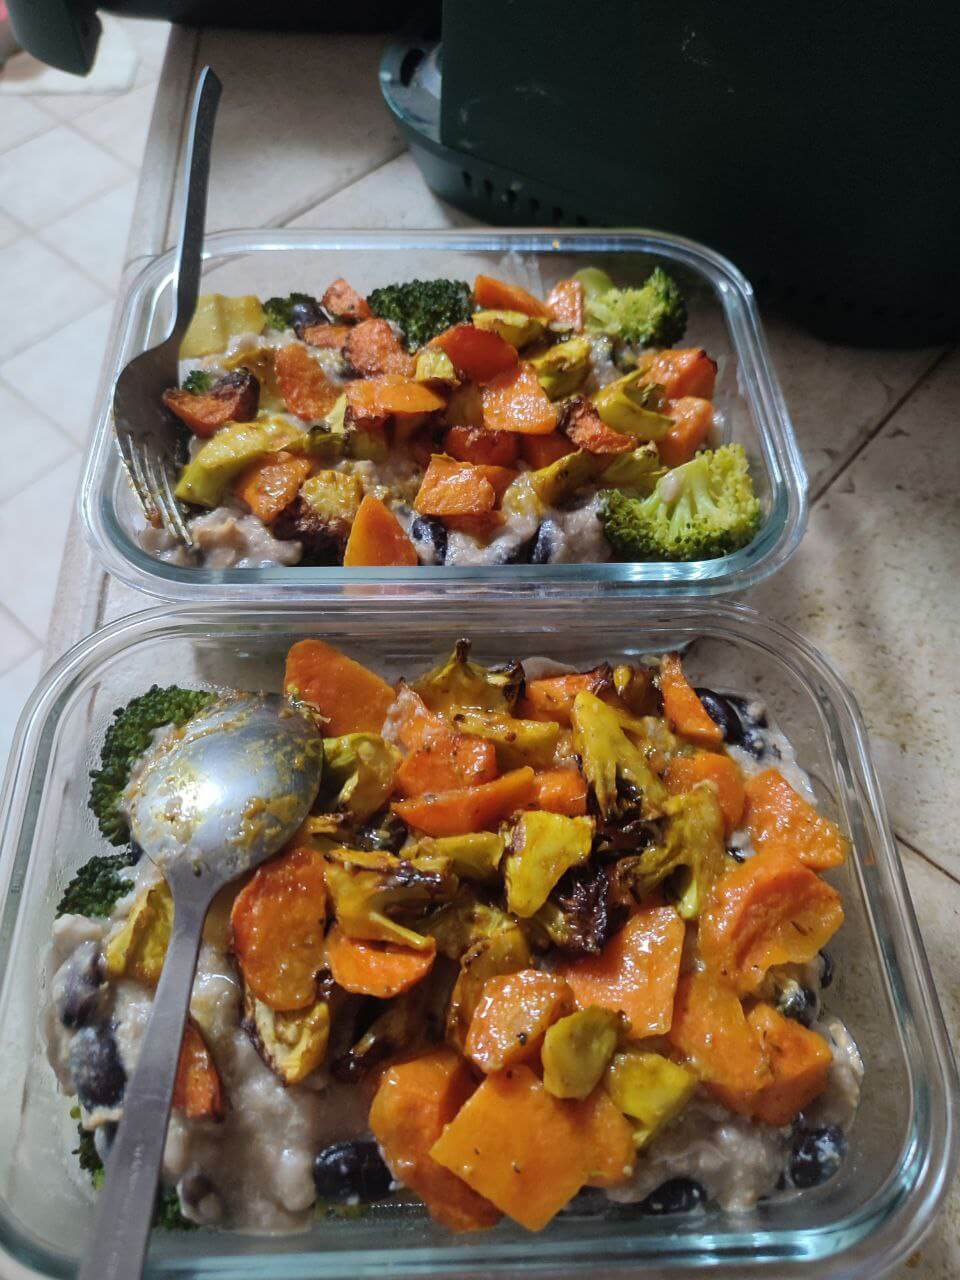
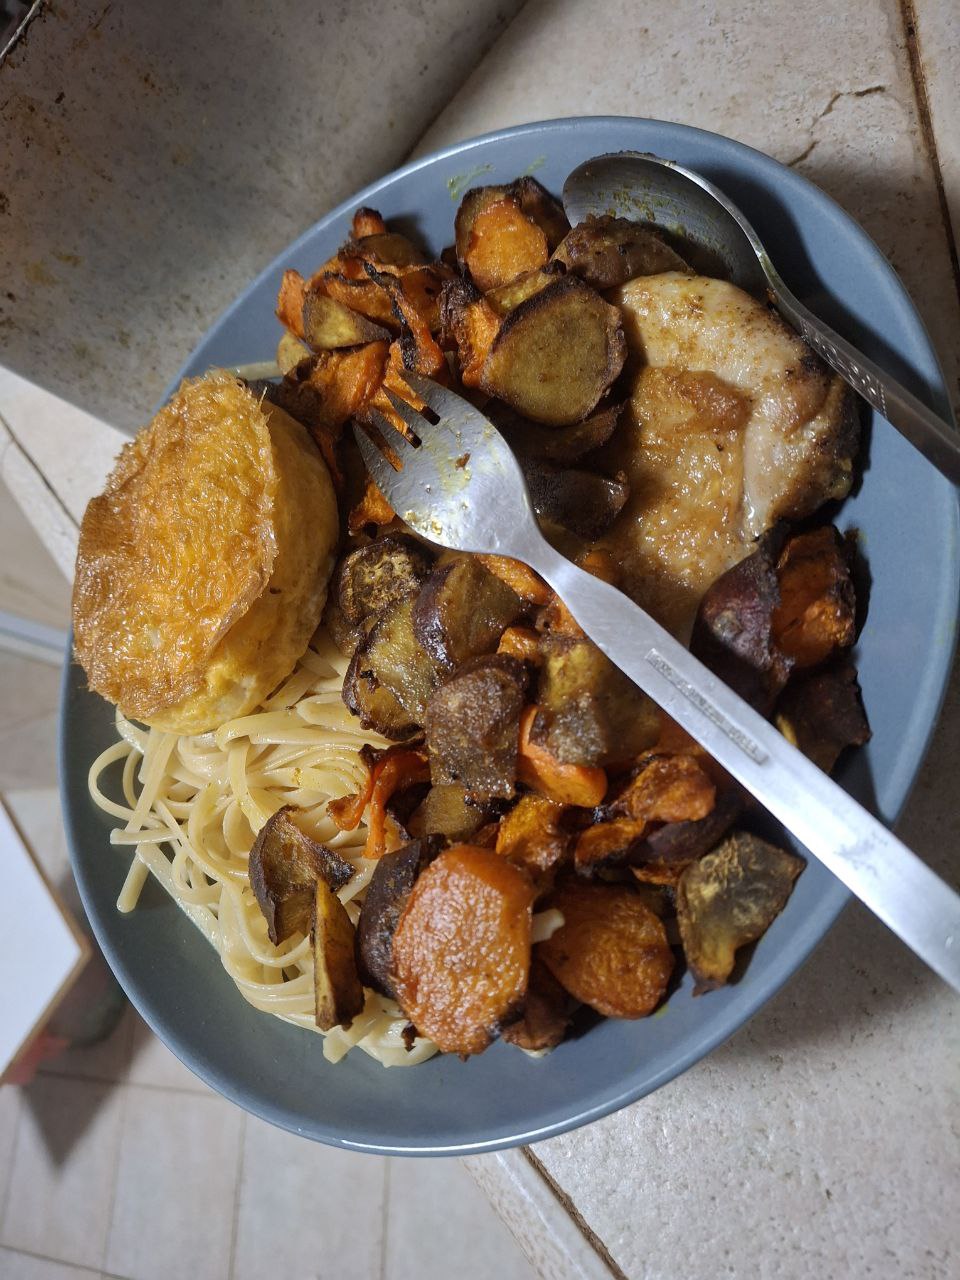
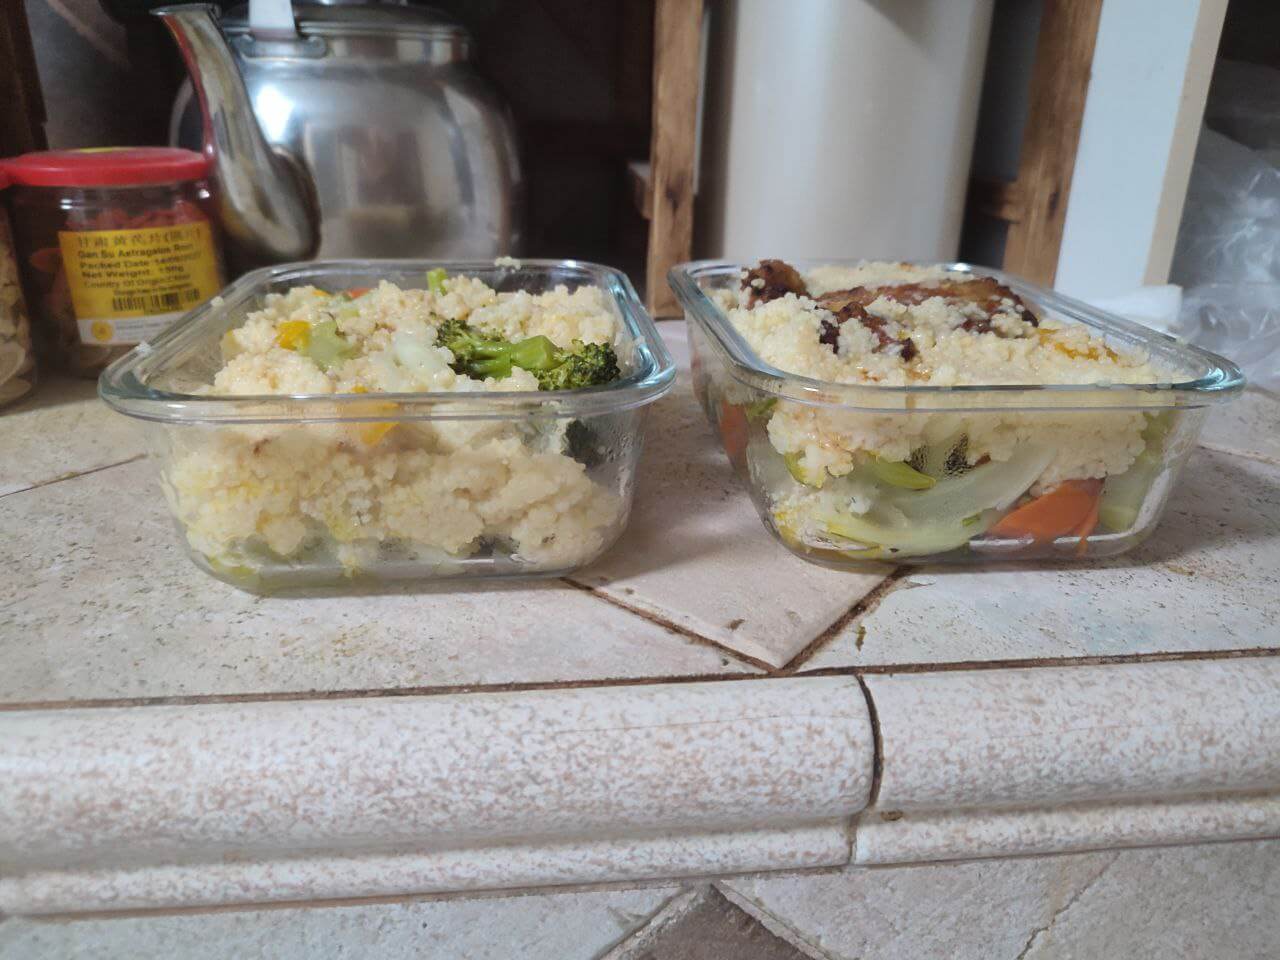
This is what it usually looks like.
This is a mixture of:
- Rolled oats
- Carrots
- Bunch of broccoli
- Black beans
- Sweet potato
- One boneless chicken thigh.
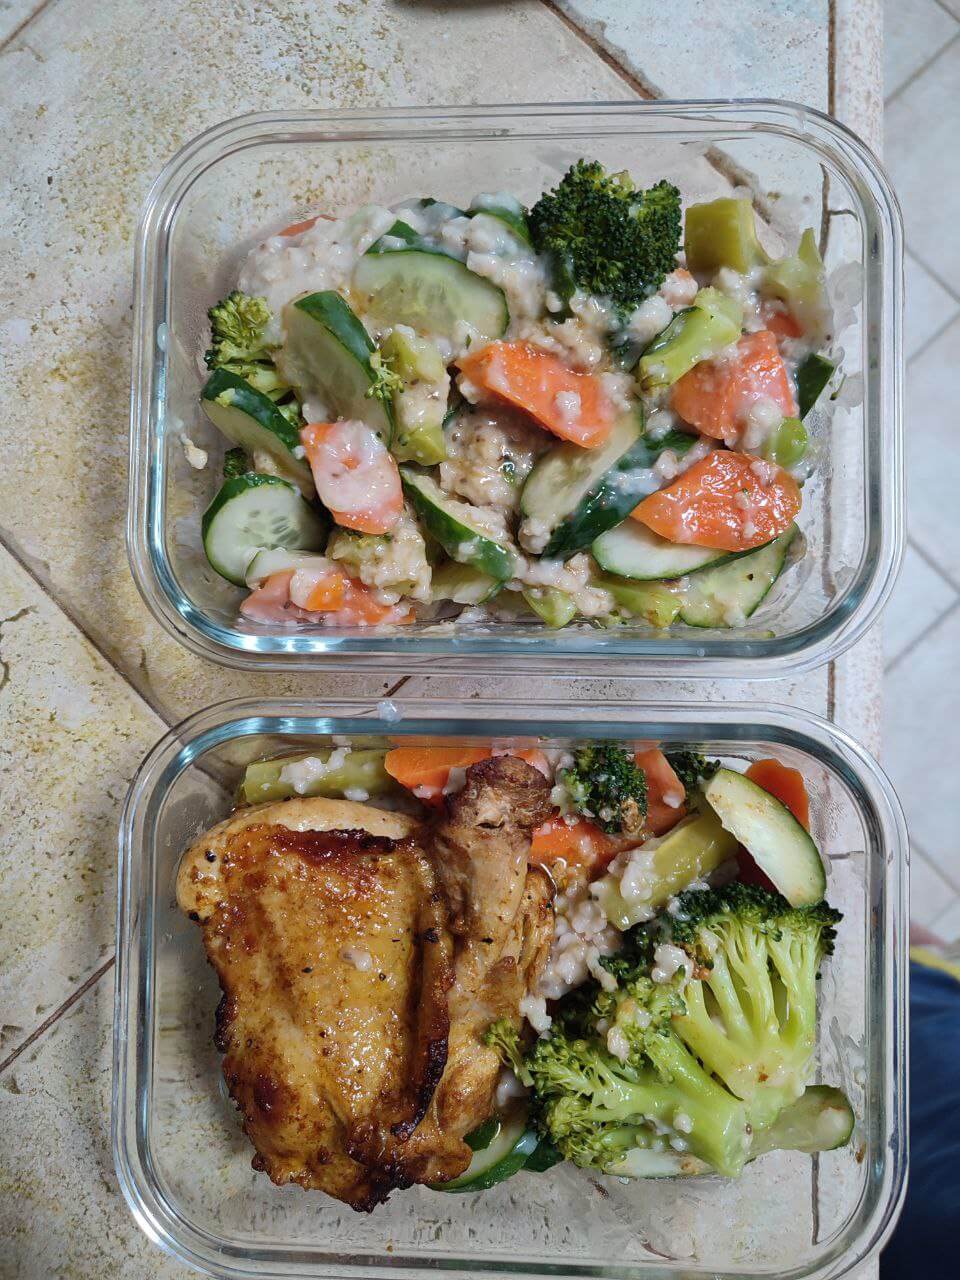
Some days it looks like this:
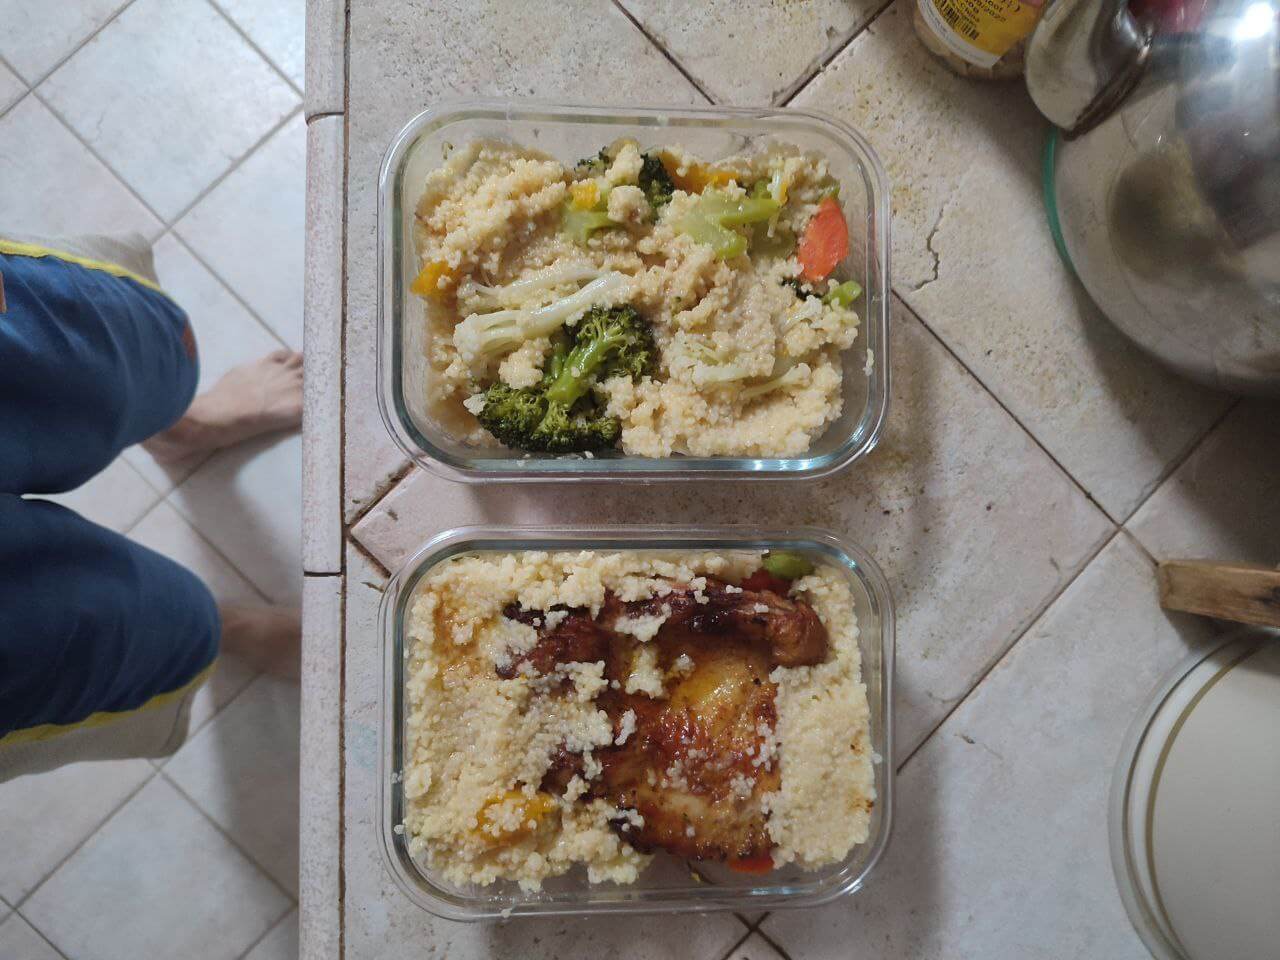
There is less stuff here:
- Millet
- Boneless chicken thigh
- Broccoli
- Carrot.
Some of my colleagues give me weird looks like I am eating some nasty stuff meant more for babies.
I Eat The Same Thing for the Two Meals
I eat the same thing five days a week.
That also means I eat the same thing every day, for five days.
My Meal Prep System
My last meal prep experience help calibrate what I can do, and what I don’t want to do.
So, I arrive at this system:
- The Cleaning and Storing Prep: Spend some time in the off hours batch prepare the ingredients then store them away.
- The 1-Hour Cooking: I am okay with cooking if there are not too many permutations. So I will cook for 1 hour in the morning before leaving for office.
I used to:
- Clean the ingredients.
- Cook.
- Store in Freezer.
During the weekends but decide against it because I realize the food feels a little weird and I had to still heat & fry it on the actual day.
The biggest peave or mental load was the cleaning of ingredients personally and if I was able to batch do that, then its good.
If we dive deeper, this is my system:
- On Saturday morning: Go to the wet market to buy the vegetables.
- On Saturday morning: Wash the vegetables, dry them, then put them in a separate storage bag.
- On one week night: Wash and tenderize the chicken, then put them in separate storage bag.
- Every morning at 6 am. Wake up and cook for roughly 1 hour.
Ok let us go vegetable shopping.
Buying Vegetables
Now, you don’t have to do what I do. There is a trade-off for time. For some, you may even be willing to just use Redmart delivery and this would not be part of your process.
Every Saturday morning at about 6am (if I can wake up), I will cycle to the wet market at Sengkang central to buy some vegetables.
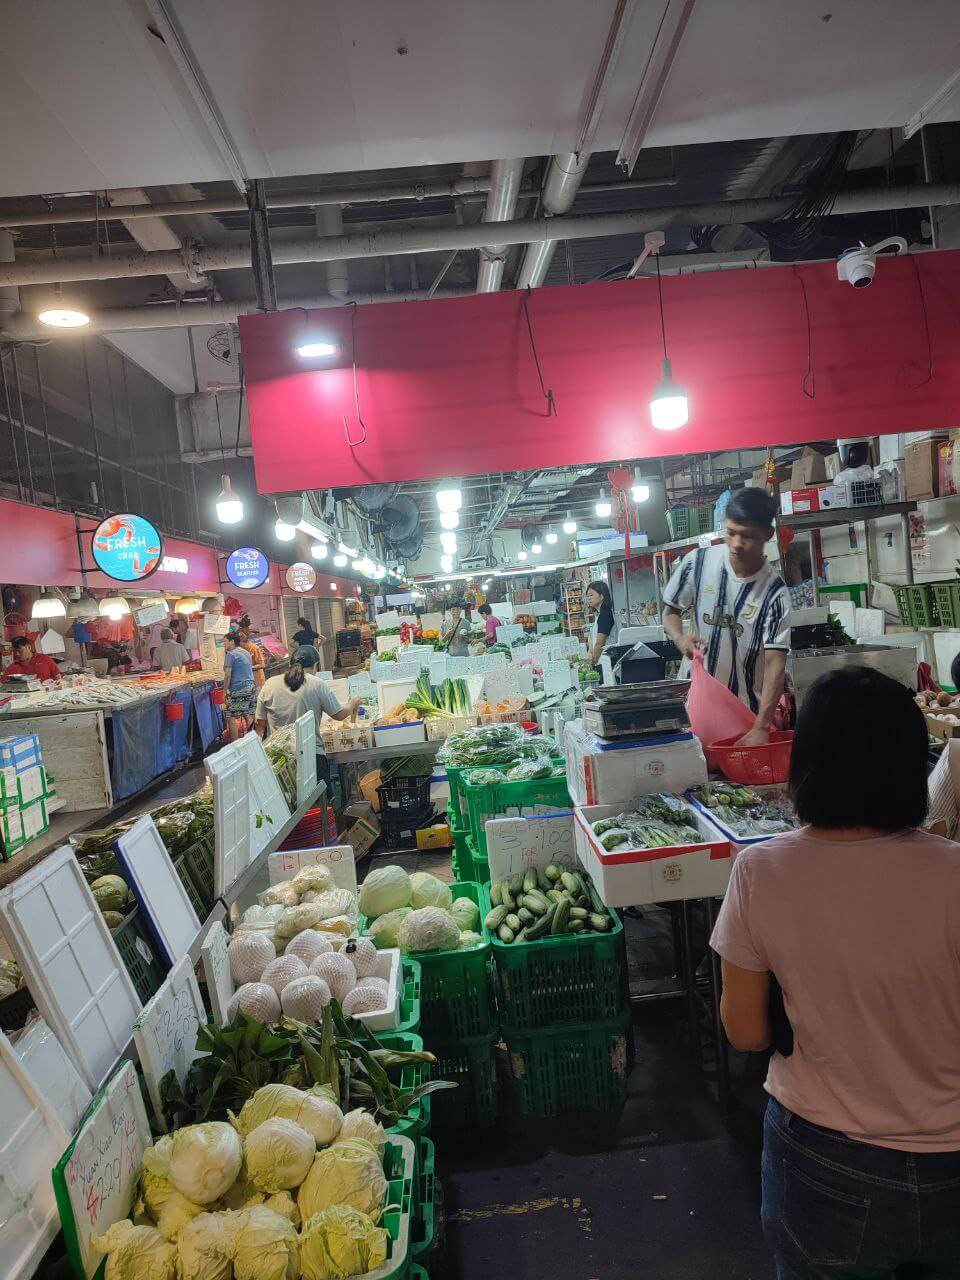
I am not sure if the early bird gets the worm but one of the reason is also the predictability of getting the sweet spot between freshness of the vegetables that I want AND NOT HAVE TO THINK ABOUT IT.
I don’t want to order veggie then come dunno if I need to go get it again.
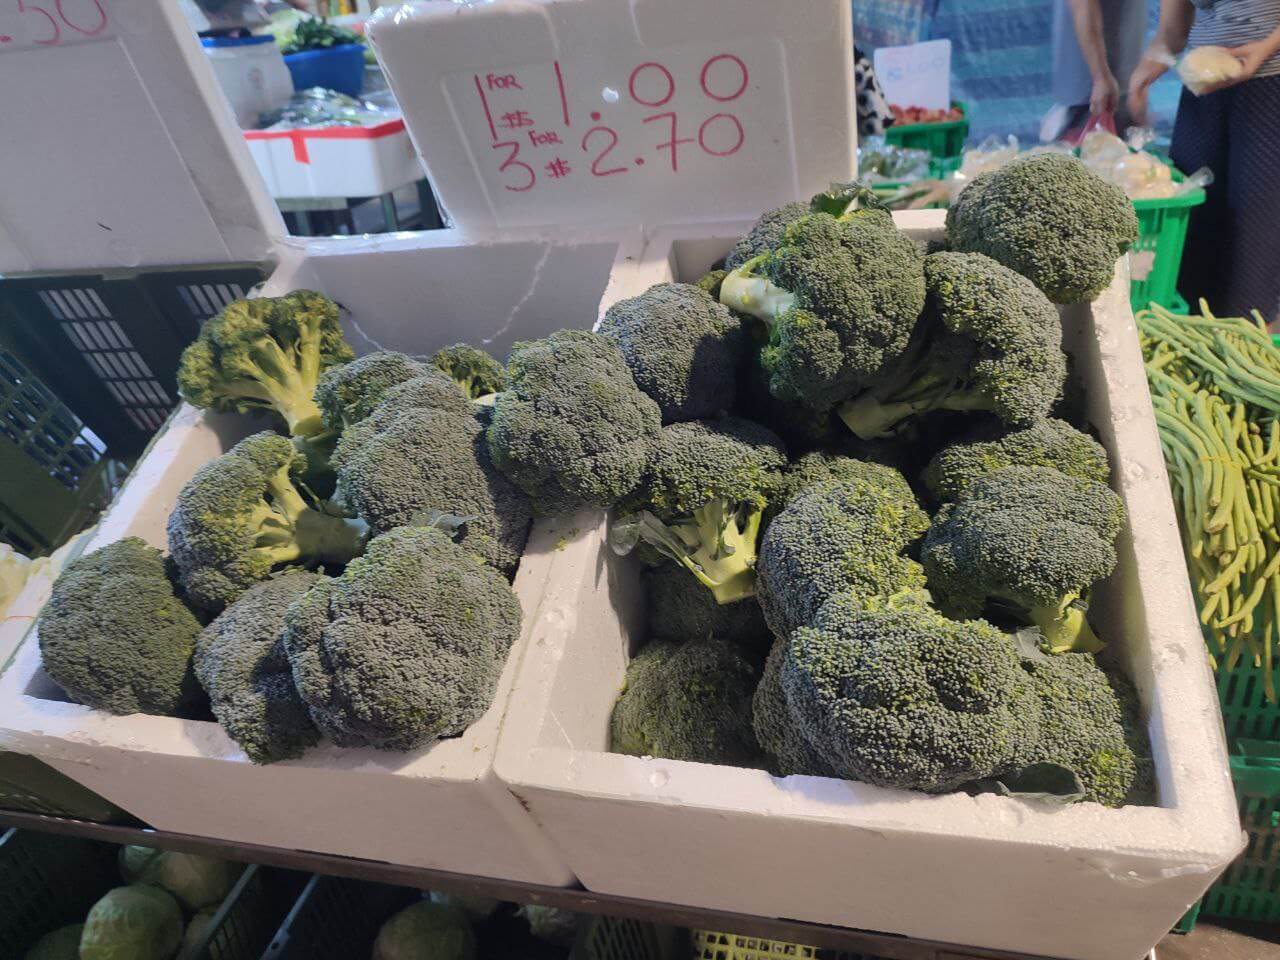
The staple of my daily meal is about two of these broccoli. I am not sure whether 1 for $1 is expensive but it is okay for me.
I show this to our lead of Brand Nataly and she will say: “Still expensive. Next time come Bedok. My mummy say the broccoli is 3 for $1.”
Out of the question. Cycling to Sengkang Central is the furthest I will go.
But to be fair, the prices not too different from NTUC, so for those short of time, you can get it at your local supermarket.
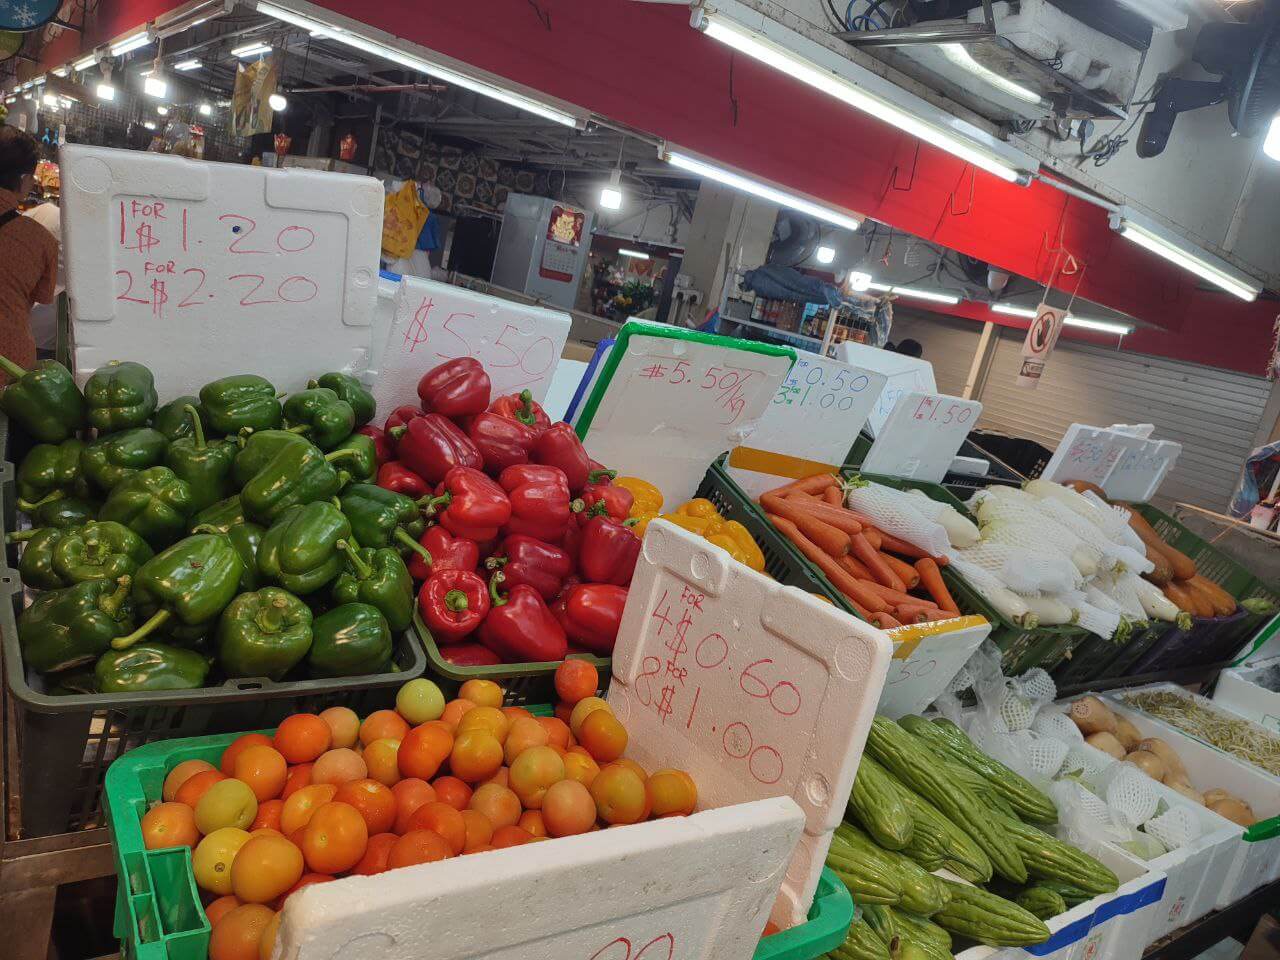
Here are some more veggie prices:
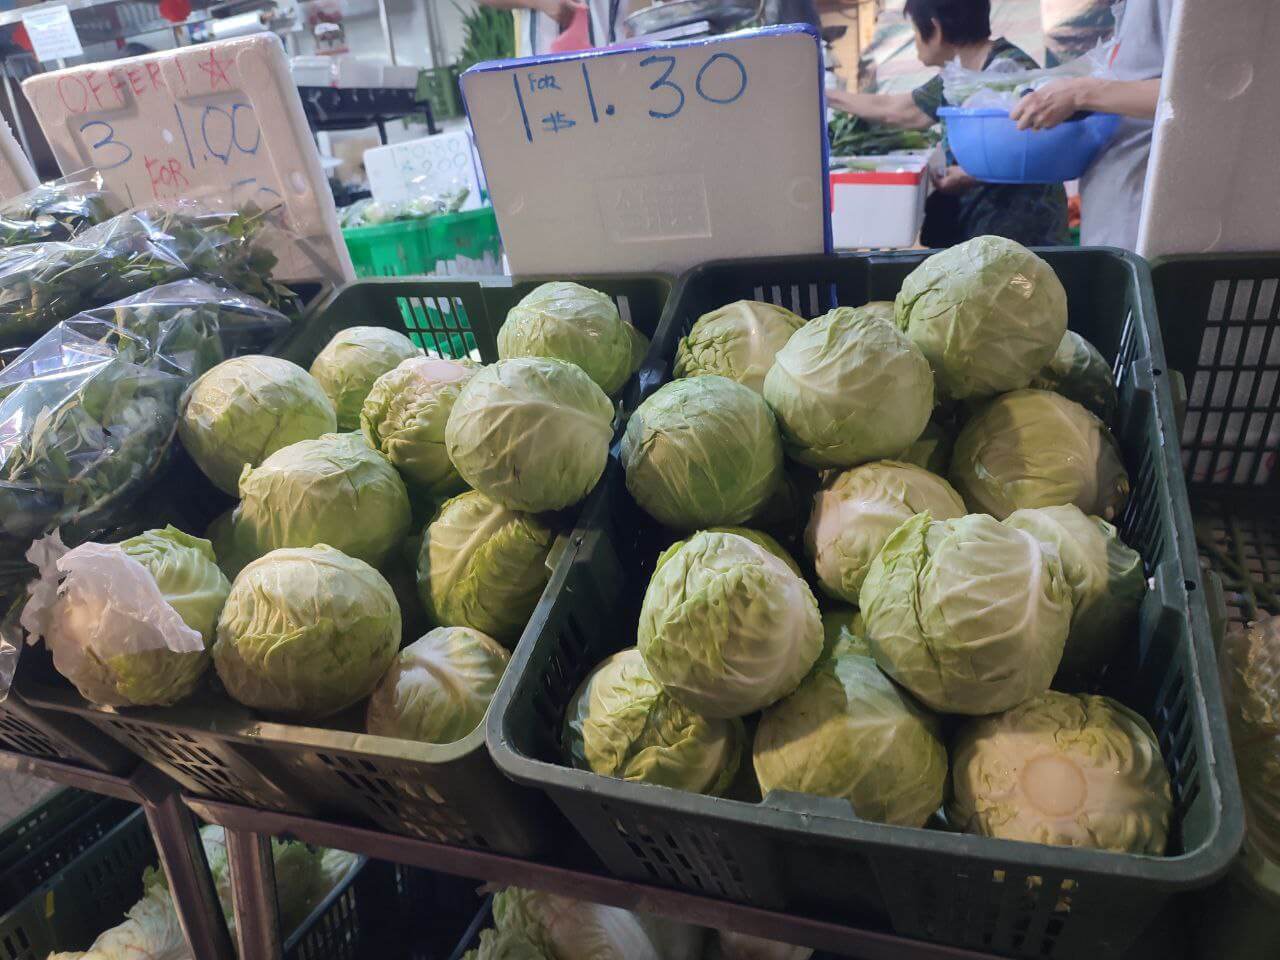
When I came back from Taiwan, I really want to try cooking Beijing cabbage myself to see if the cabbage in Taiwan is different or is the way they cook it.
This is not part of the daily meal prep but cabbage has some real price volatility.
Then, we will put in a basket to buy it:
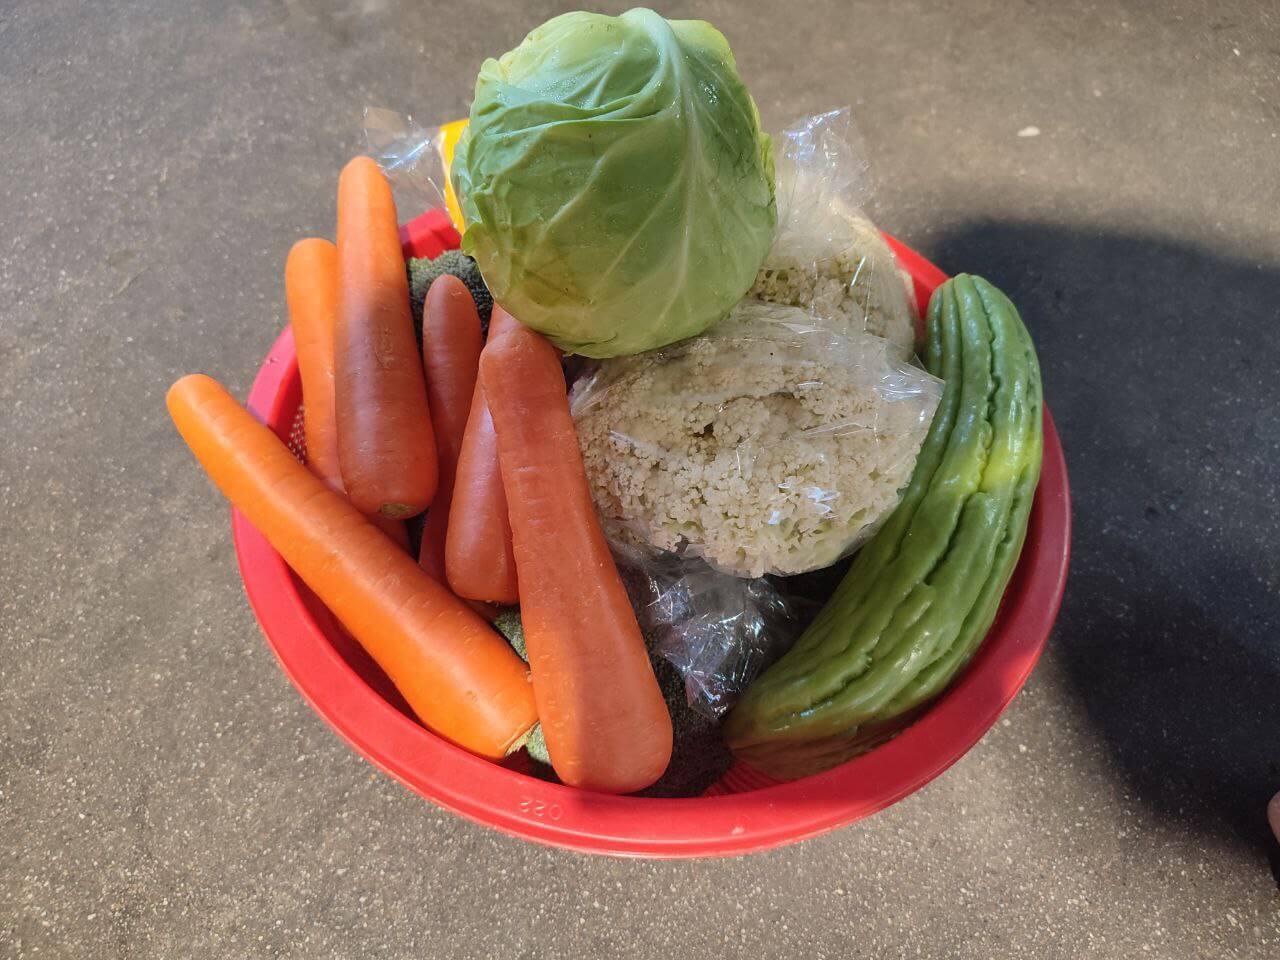
I would usually buy the meal prep vegetables together with some stuff that I wanna experiment with.
The food for the meal prep usually would come up to $10.
Buying Protein (Meat)
I get my protein from Chicken boneless thighs:
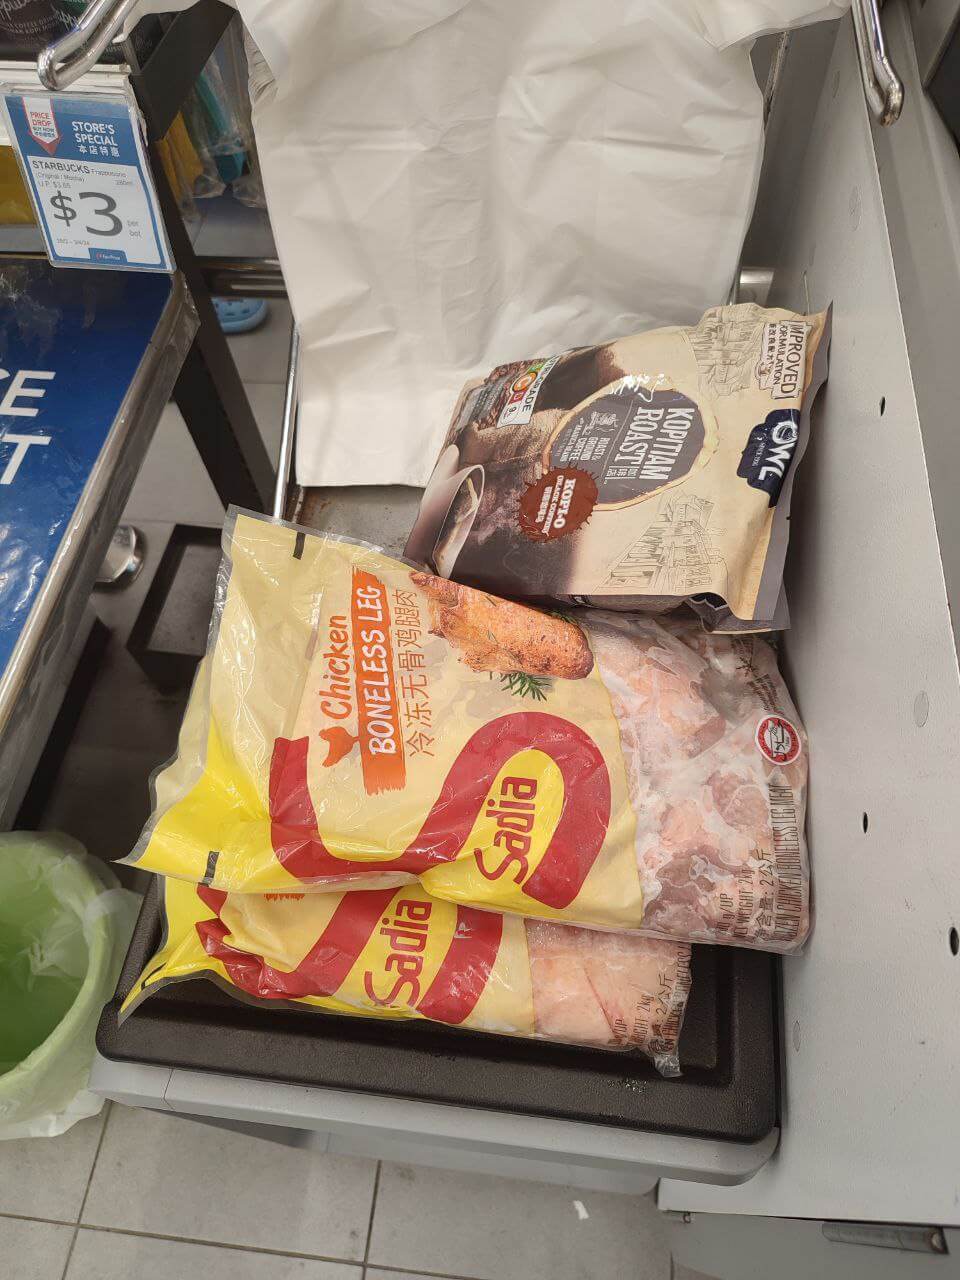
If you go to your local supermarket, you be able to spot these 2KG Sadia or Seara chicken boneless thighs. As the name suggest, the bones are removed so with some light washing you can almost use them.
- There are usually 6-7 thighs in one pack, so it is just nice for 1 week.
- Each pack usually cost either $8 (Seara) or $9 (Sadia) which makes the cost of one thigh to be $1.30 a day.
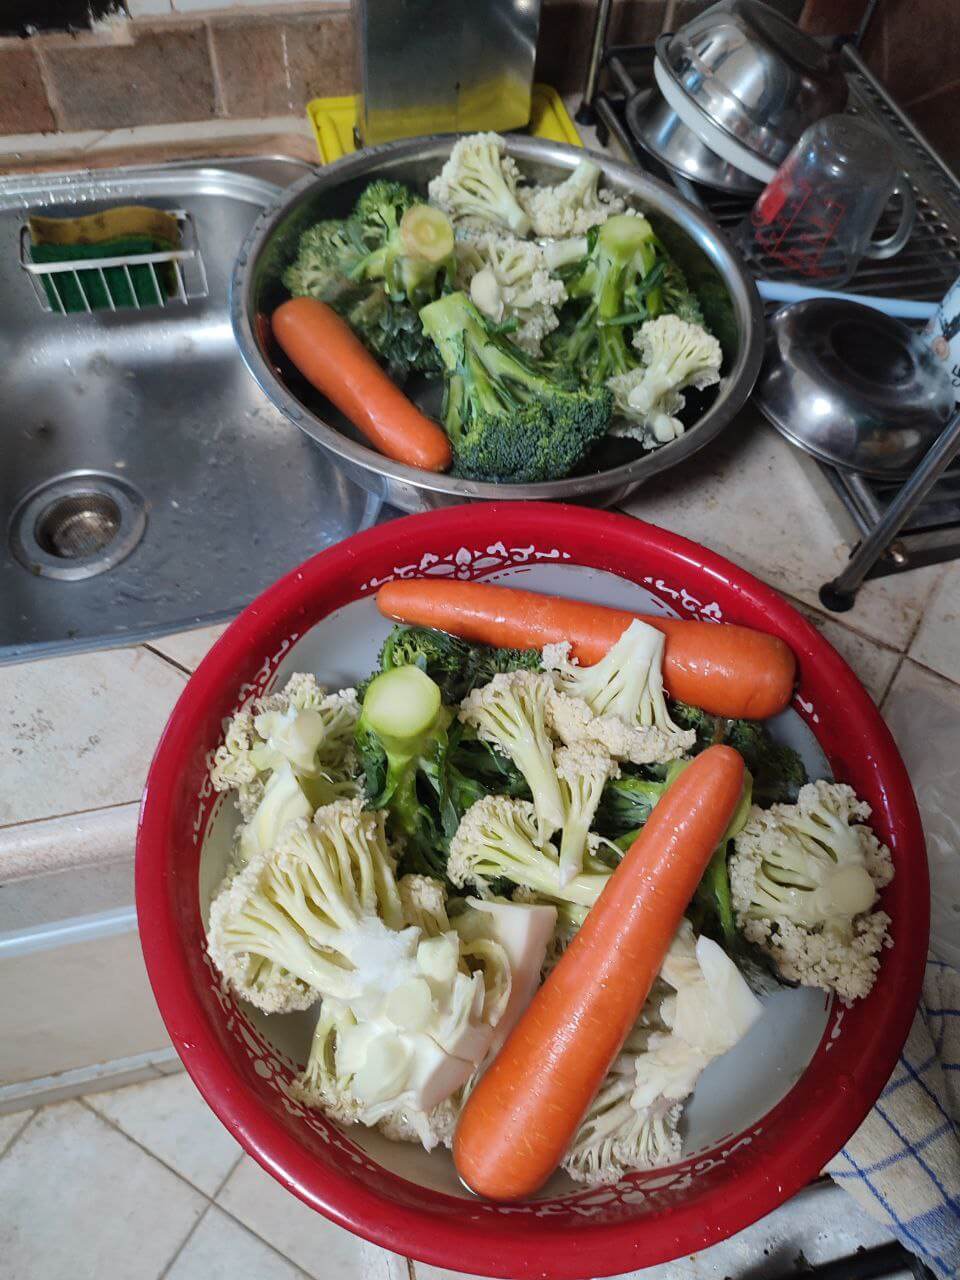
Cleaning & Storing the Vegetables
Once you are back from the market, you can then clean and store the vegetables. As you need to dry the vegetables, you may need to check your schedule if you will be around for half a day.
There were days where I had to go to a Providend RetireWell event and I washed it then let it to dry before storing it later.
We need to wash the vegetables cleanly.
For this, you might need some large basin but I wonder if a rather medium size pail is good:
I would usually add salt and vinegar into the water and let the vegetables sit for 15 minutes. There seem to be some vegetables cleaning liquid sold and you may want to try them.
After 15 minutes, it is time to rinse the vegetables and then let it dry.
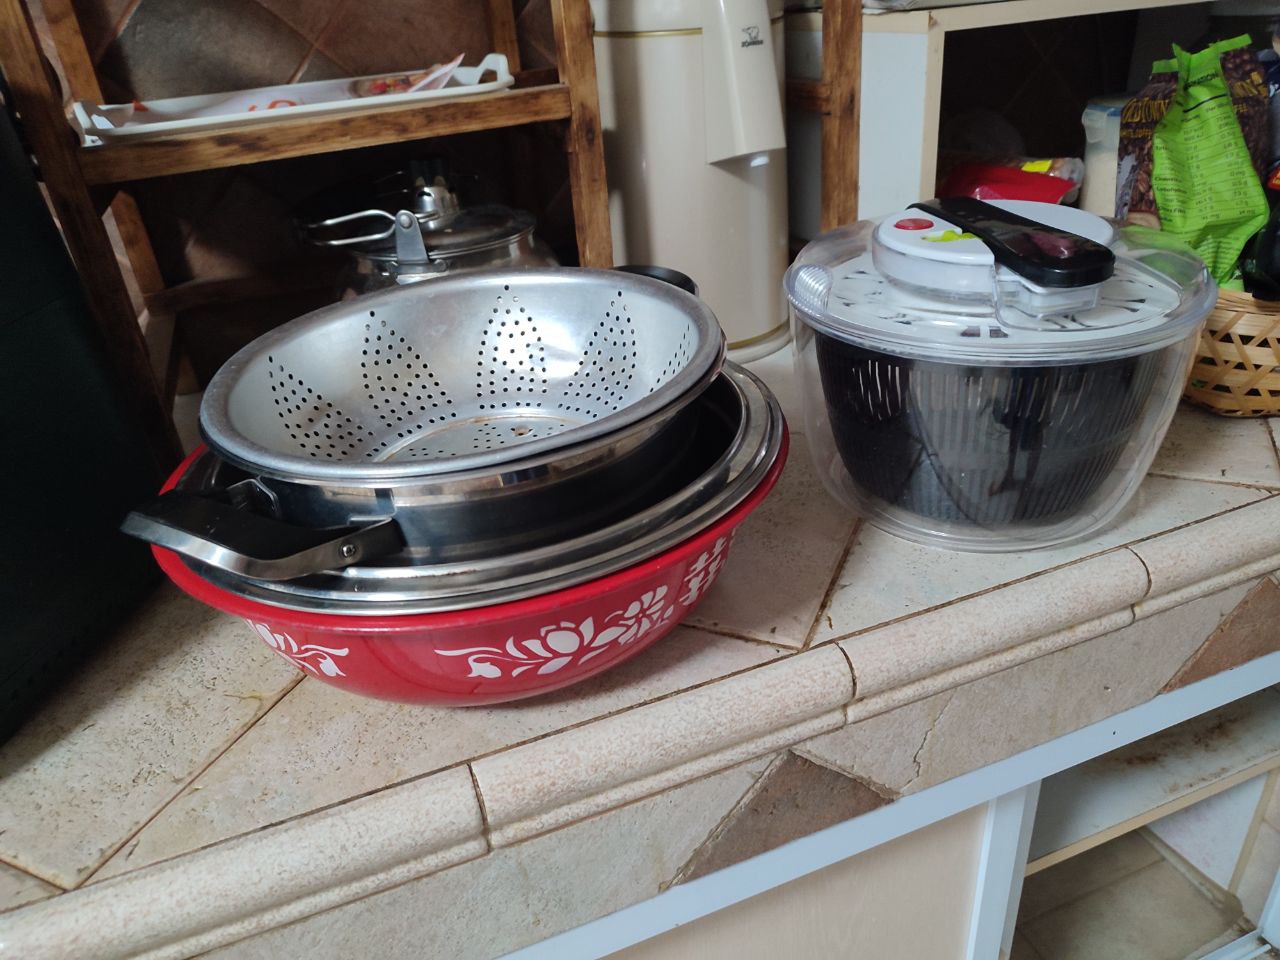
Tools are important and what you may need is about 3 to 4 basin so that you can concurrently soak the vegetables but if you would like to do it one at a time, you can also do that.
I bought a spinner basket meant to dry vegetables for salad and it seems useful to remove the water from the vegetables.
The reason is that vegetables last less long if it is not dry.
While the salad spinning basket is good, I feel it is faster if we pad dry with paper towels. Paper towel remove larger amounts of moisture.
Usually I use like 8 pieces of those large paper towels.
We leave it dry for the morning.
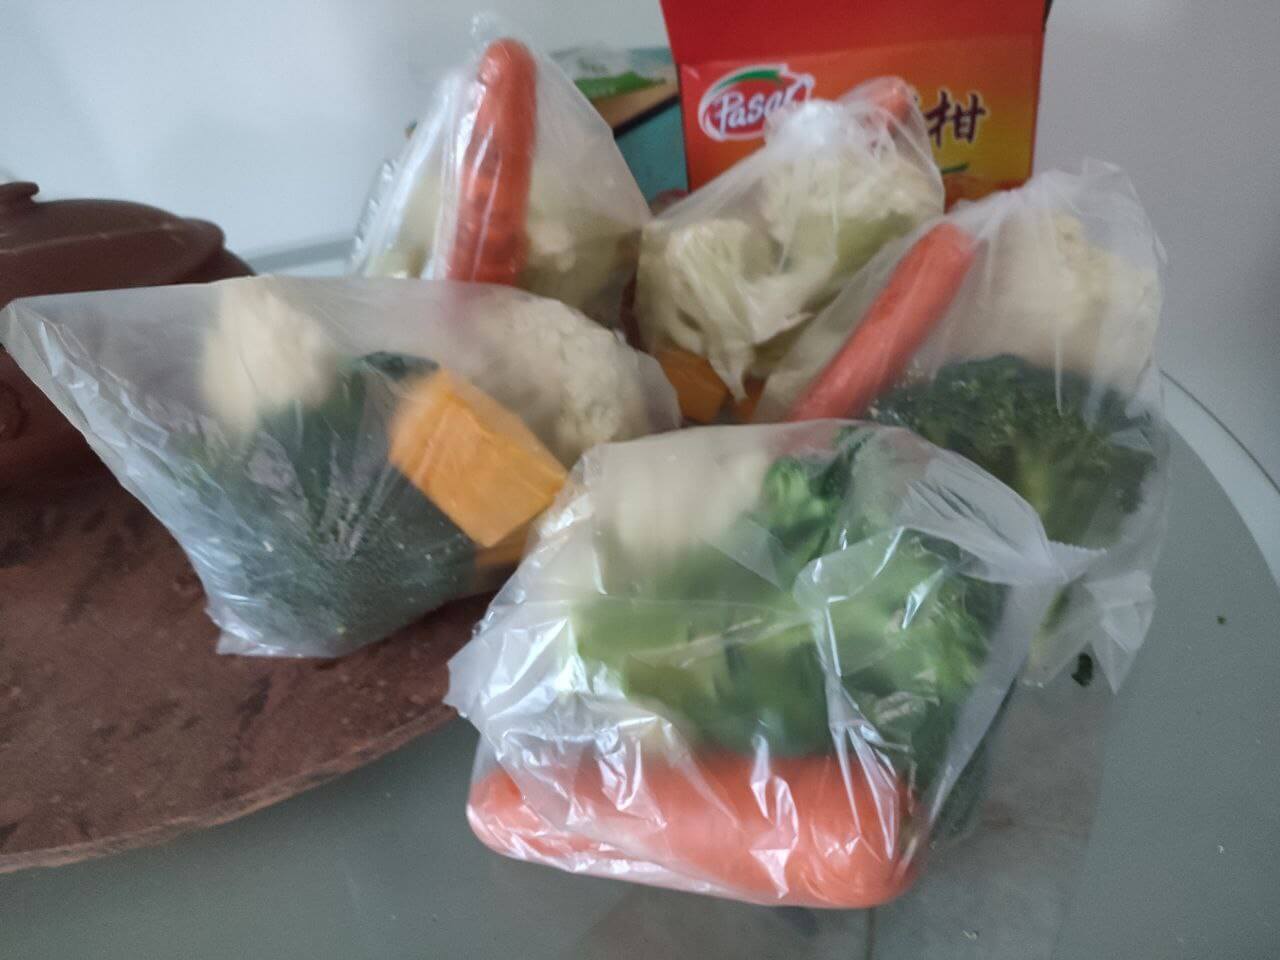
After that, we pack them into the plastic bag that we get from the vegetable seller.
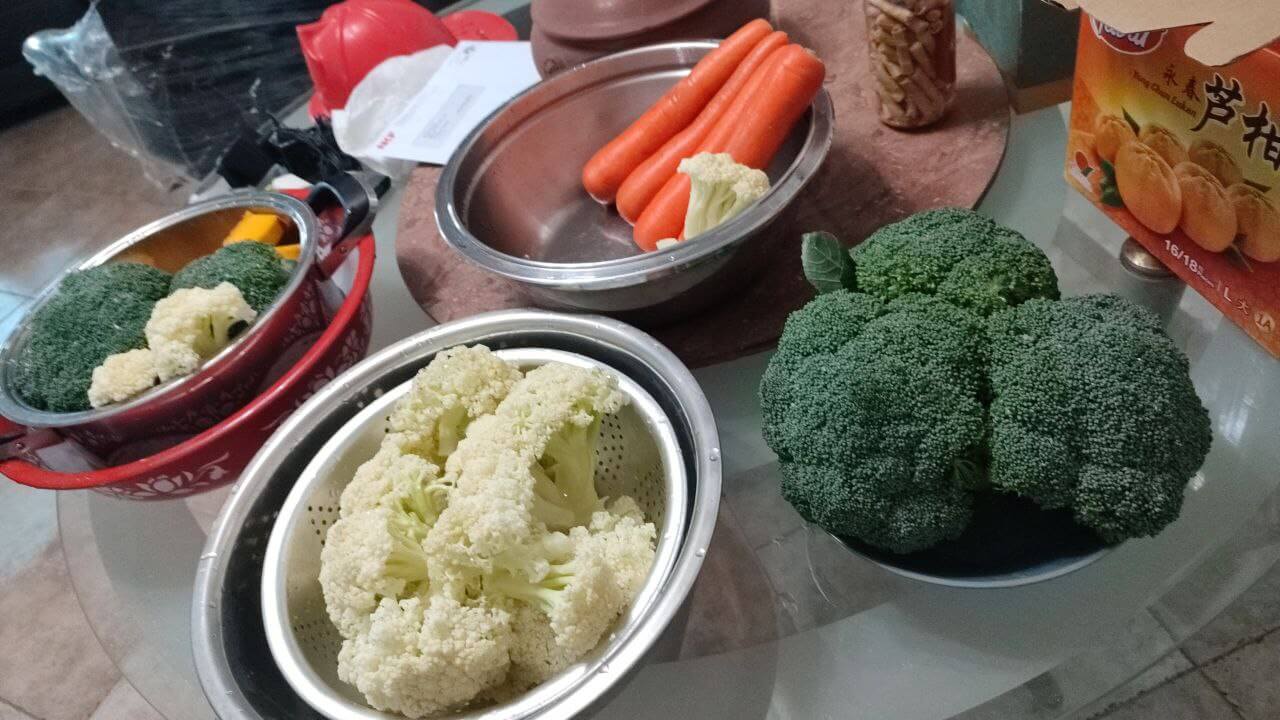
There will be some trial and error regarding how much to prepare for a day. What we see here is from a few iterations ago.
This is too much for Kyith!
Eventually, what I prepare nowadays is:
- 2 x broccoli
- 1 x carrot
- sometimes 1 x small sweet potato.
If we count the cost, that will be almost $2.30 to $3.00 for one day.
We put these bag into the lower (non-freezer) part of the refrigerator.
Tenderizing & Storing the Chicken Thigh
I call this Tenderizing the meat because that is what I am doing.
You may have the option of marinating the meat during the weekend, and when you need to cook it, it is faster. I did not marinate because I thought it wouldn’t take that much effort to marinate just before I needed to cook.
My method is not the most efficient, and you may share why marinating is better.
Now, tenderizing is the process of making the meat softer so that it is easier to chew.
I remember the first time I did this, the chicken thigh was so hard that I knew it was unsustainable.
I can tell you… if you don’t marinate well but the chicken that is cooked is tender enough and still juicy, that is all that matters. Tenderizing is the process of breaking down the beat fibres and collagen so that the meat will become softer.
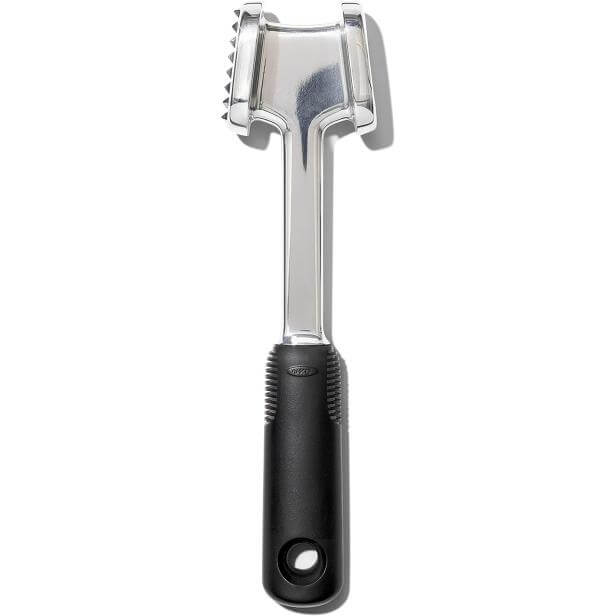
There are a few ways to tenderize meat, including this aggressive-looking thing:
I decided to see if there is a natural way of doing it and turns out, there are various agents that can tenderize meat:
- Salt
- Vinegar
- Baking soda
- Wine
The softest and the easiest is to use baking soda. The meat turns out to be the most soft. But putting baking soda has a problem: It gives the meat kind of a weird taste, which is okay for me. But I wonder if that is a good idea.
I endured eating rubbery chicken thigh for a few weeks, trying different things, from poking holes and other weird stuff, before one day, I realize today’s meat was so tender!
I quickly ran through my head what did I do differently!
After some trial and error, I realize what tenderize the meat: I accidentally put too much salt and the salt tenderized the meat.
But there is still a trial and error when do I do it, whether before I cook, for how long or if I put salt before I put in freezer, would the tenderizing effect still persist.
I did the experiment so that you don’t have to.
a. Defrosting the Chicken Thighs
- You can store the meat you purchased in the freezer.
- If you are meal prepping and have the time, and don’t want to spend too much attention, move the meat from the freezer to the bottom level.
- If you need to prep immediately, you can either microwave or if you wish it to be more natural, put a basin of water, dip the entire package of meat into it and it will defrost faster.
- If you have time and choose to put the chicken thigh at the bottom level of the fridge, usually it takes 3 days to defrost in this way. This means you put in the fridge on Monday, by Thursday, the meat is defrosted enough for you to easily process them.
Why are the above considerations?
Having your mind in the preparation process is something to think about and takes away the mental memory or headspace from doing other things.
You may not want that.
I decide to do the 3 days thingy.
b. Wash and Generously Salt the Meat
After cutting open the package and washing the chicken (actually they say don’t have to wash but I still wash a bit lah), we put them in a container like this:
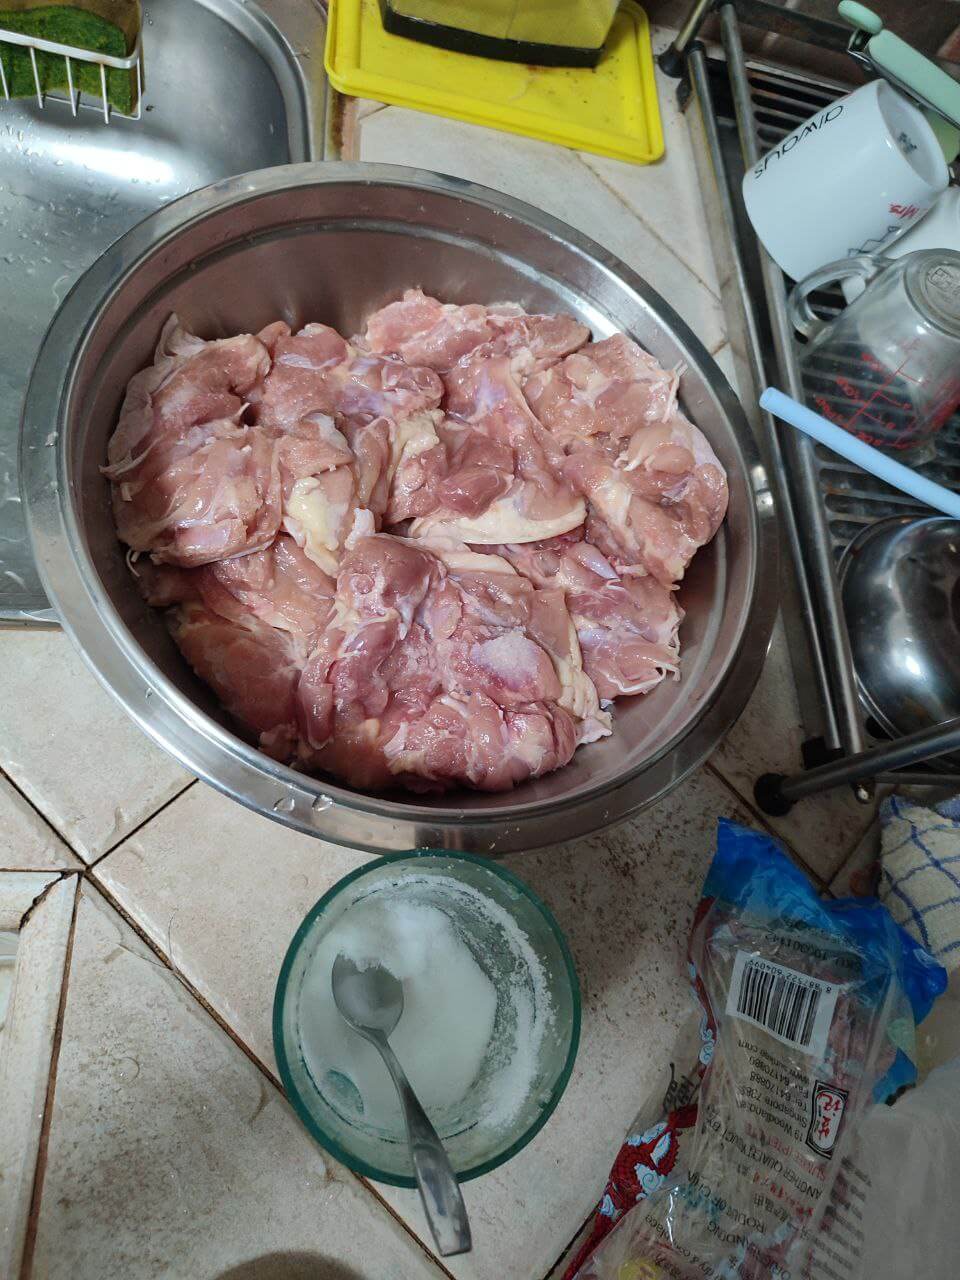
Drain excess water from the container.
Then, generously salt the surface of the chicken. Salt the side without the skin is enough.
I bought the one big packet of salt that cost $0.40 for this operation.
I use my left hand and put the chicken on my palm and use the other hand to take the spoon and just put 1-2 teaspoon of salt. Then move the palm around (takes some practice) to make sure it is well spread out.
Do this for all of them.
Why don’t I just sprinkle the salt into the container?
Because you may not remember which meat you have sprinkle or whether you have sprinkle enough. You need to make sure that each of them are processed evenly enough.
c. Wash away the Salt After 15 Minutes, Package and Store them
You just have to leave them like this for 15 minutes.
There after, you can wash off the salt with water (because you don’t want to eat so much salt!).
When you wash off the salt, do squeeze the chicken and try your best to remove more moisture if eventually you want the skin to be crispy (moisture will make the skin difficult to crisp but you can also use a paper towel on the skin. Kyith does not mind the skin not crispy. He values time more).
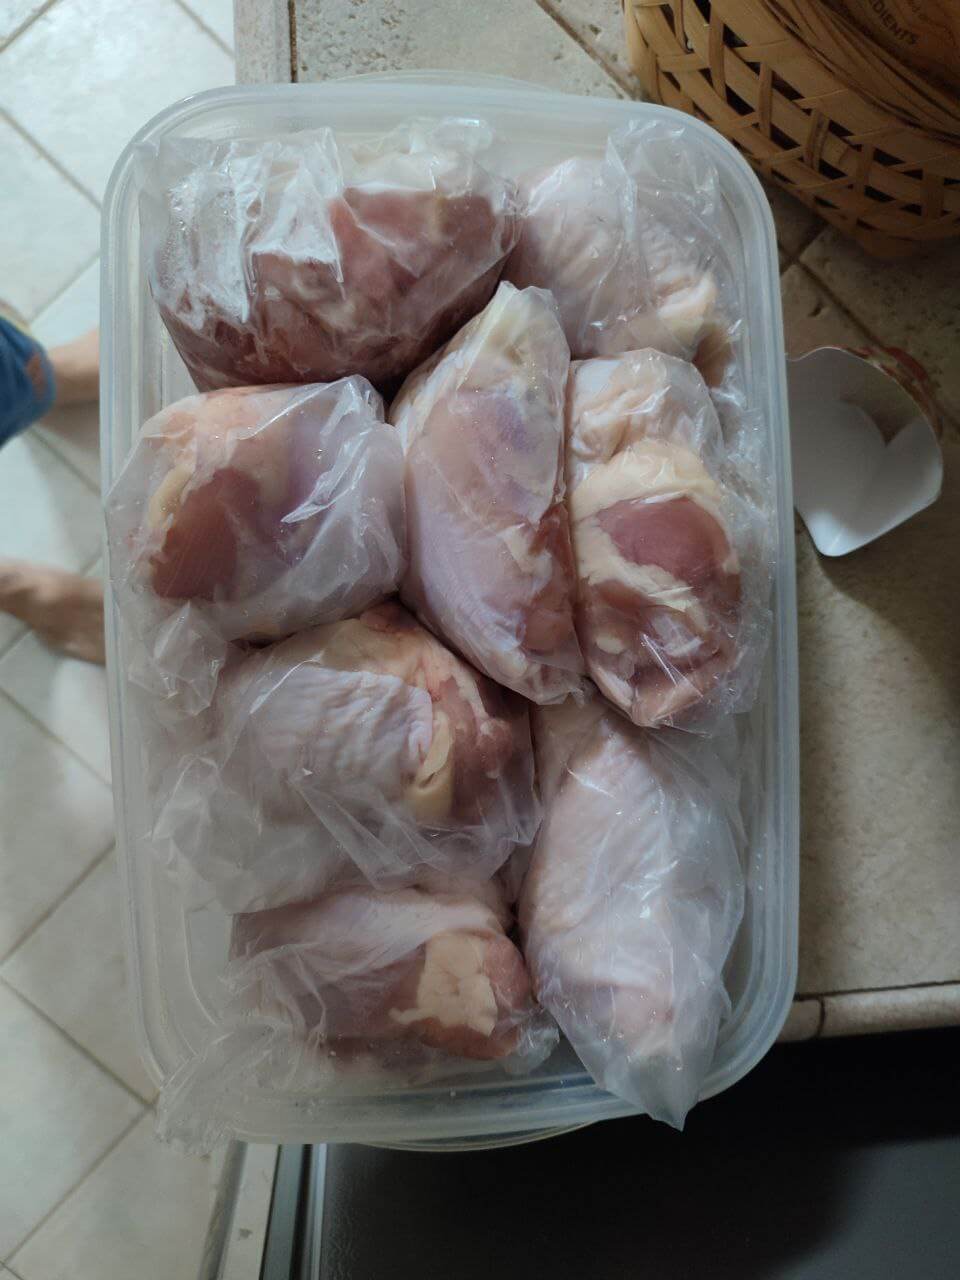
We can then put each of the thigh into a plastic bag and store in the freezer.
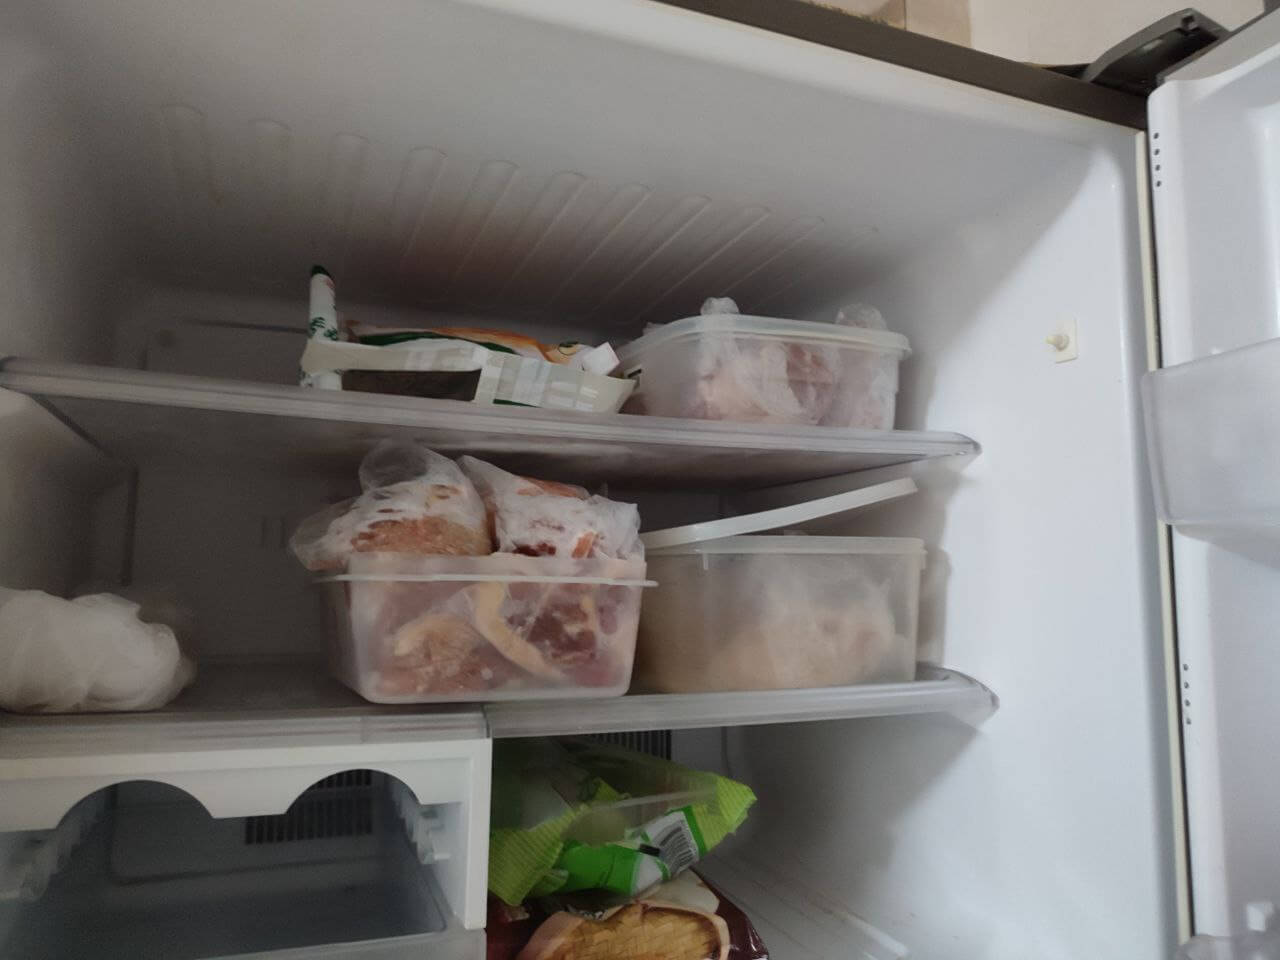
Leave a day or two of thigh at the bottom level of the fridge for those you will eat soon.
The natural defrosting takes about 24 hours so make sure you always move one thigh down daily.
My habit is every morning, before I cook this current chicken thigh, I move one from top to the bottom of the fridge.
So in this picture, you see I have 3 days worth of protein.
Done with the prep.
The 1 Hour Cooking in the Morning
So with all the meal prep we have:
- A chicken thigh that is defrosted enough in the fridge.
- A pack of vegetables that is washed.
We can start cooking.
I need to prepare the following in that short period of time:
- Cook some carbs, usually rolled oats.
- Airfry the chicken thigh and some vegetables.
- Steam the broccoli.
In order to shorten the time, or out of necessity, there are three “stations”:
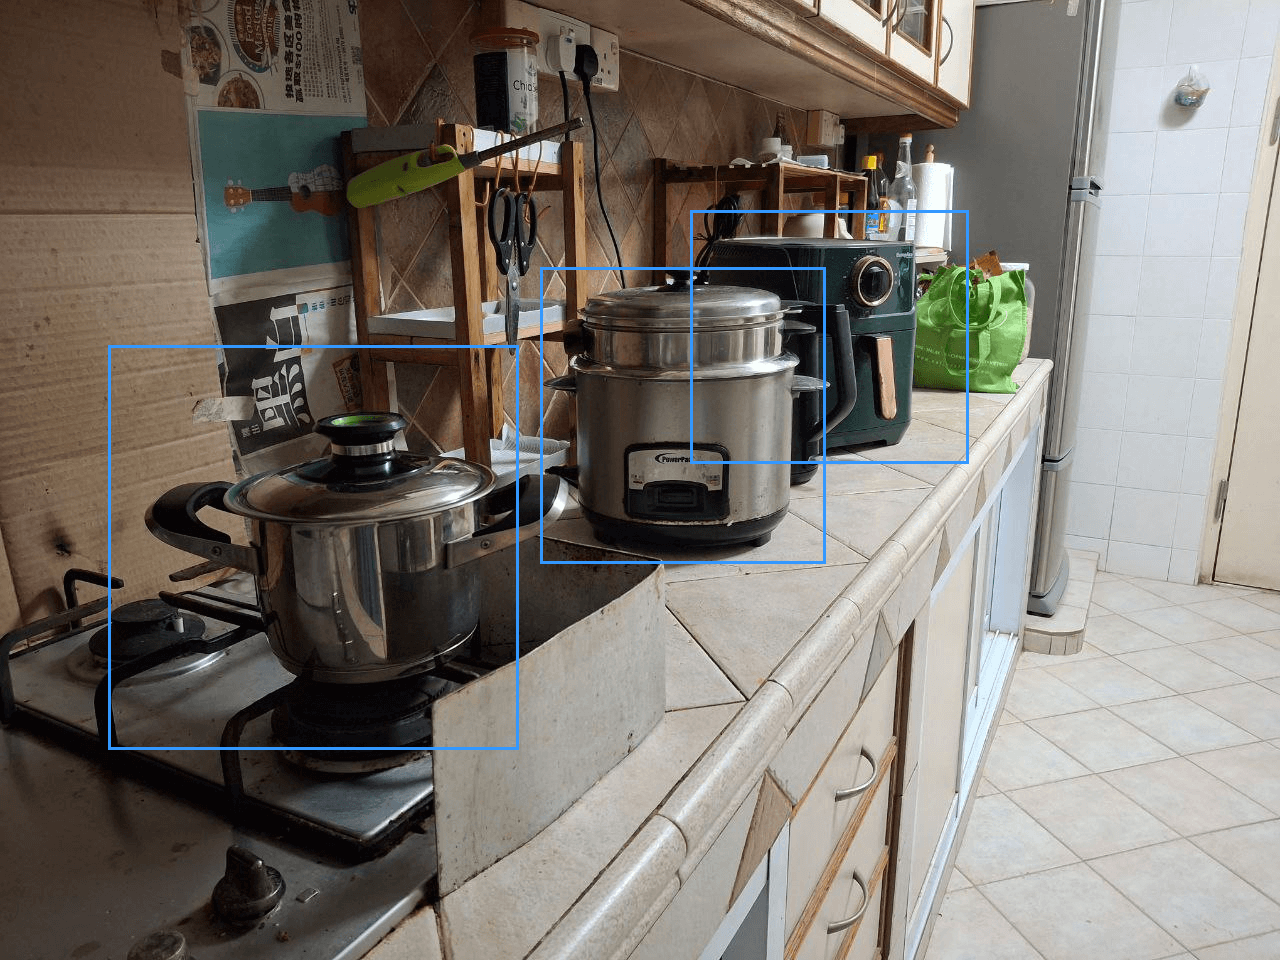
- A pot for cooking either rice (don’t ask me why I don’t use a rice cooker to cook rice)
- A rice cooker to steam vegetables.
- A Europeace Airfryer.
I have a sequence which I think is more optimized (most likely not the most optimized), and it will be this.
a. Cut the Vegetables (10 minutes)
- Take the vegetables out of the fridge to cut them.
- Place the broccoli and some carrots in a steaming tray to steam.
- Slice up the carrots, the base of the broccoli and put them in a bowl if you wish to Airfry them. (Note: If you are airfrying the carrots cut them thinner because they are notoriously hard out of all the hard stuff)
- Instead of #3, if you wish to steam the carrot and the base, you can put them in the steaming tray.
- Do remember to shread away the outer layer of the carrots if needed.
- If you are adding some root stuff like potato or sweet potato, wash them, slice and dice them and add them to the bowl to be airfry or steam.
Either I am slow or it usually takes 10 minutes.
Why cut the vegetables now? Because if you cut the vegetables, the cut vegetables may lose nutrients.
So we circumvent one part of the repeating process of washing to do this.
b. Put the Broccoli to Steam
Put some water in the rice cooker and then put the steaming tray on top and steam it.
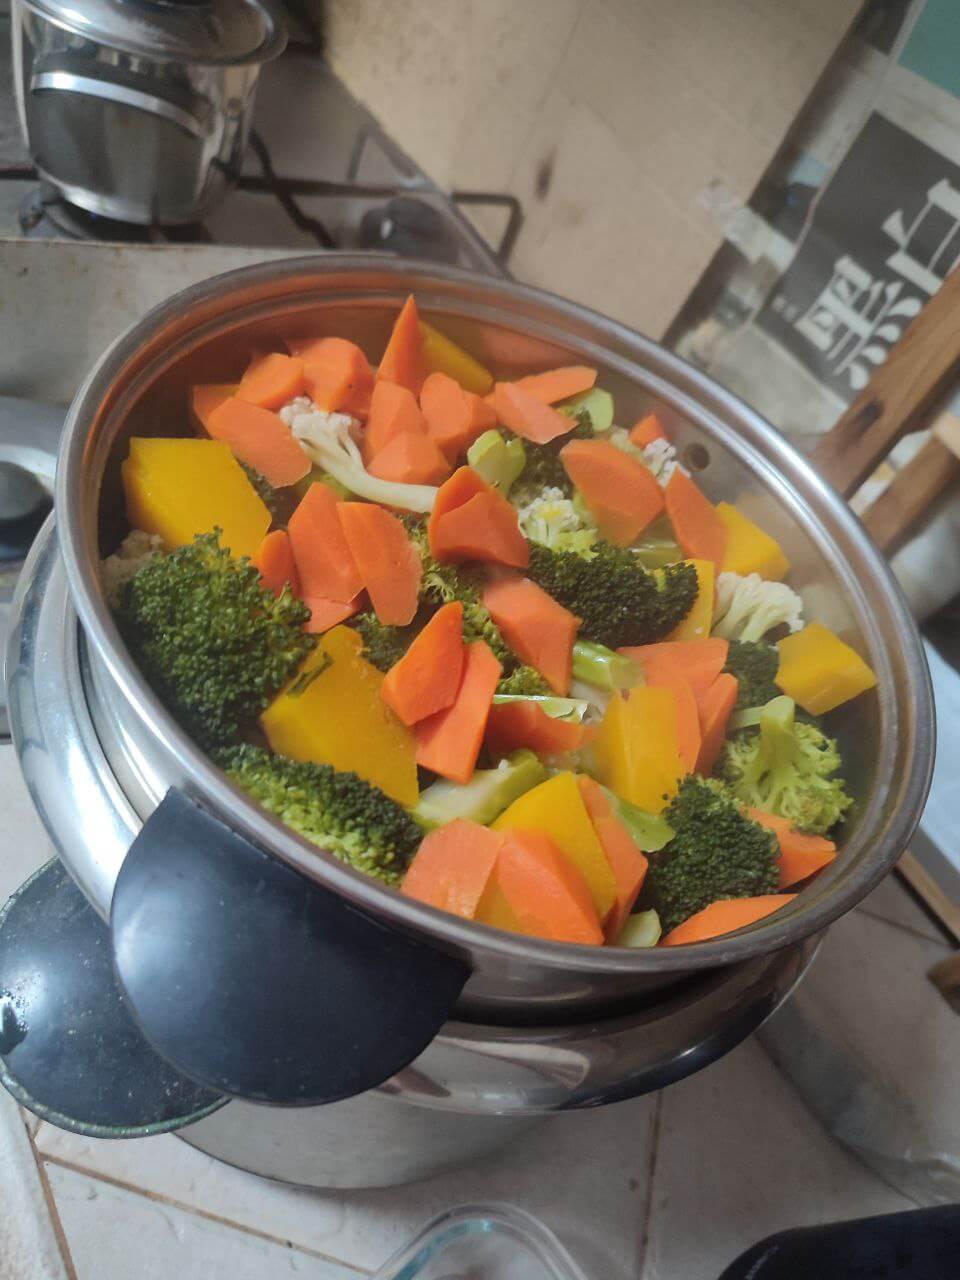
If you have a timer, set the timer to 17 minutes or so.
I do not add any flavorings as I am ok with the natural veggie taste.
The flower part should be cook faster than the root, I suspect 16 minutes also can. The objective is to get it soft enough but not overcooked.
As a rule of thumb, most of the tougher vegetables and root stuff like broccoli, carrot, cauliflower, sweet potato, potato, pumpkin use this 17 minutes steaming time is good.
You have 17 minutes to work with!
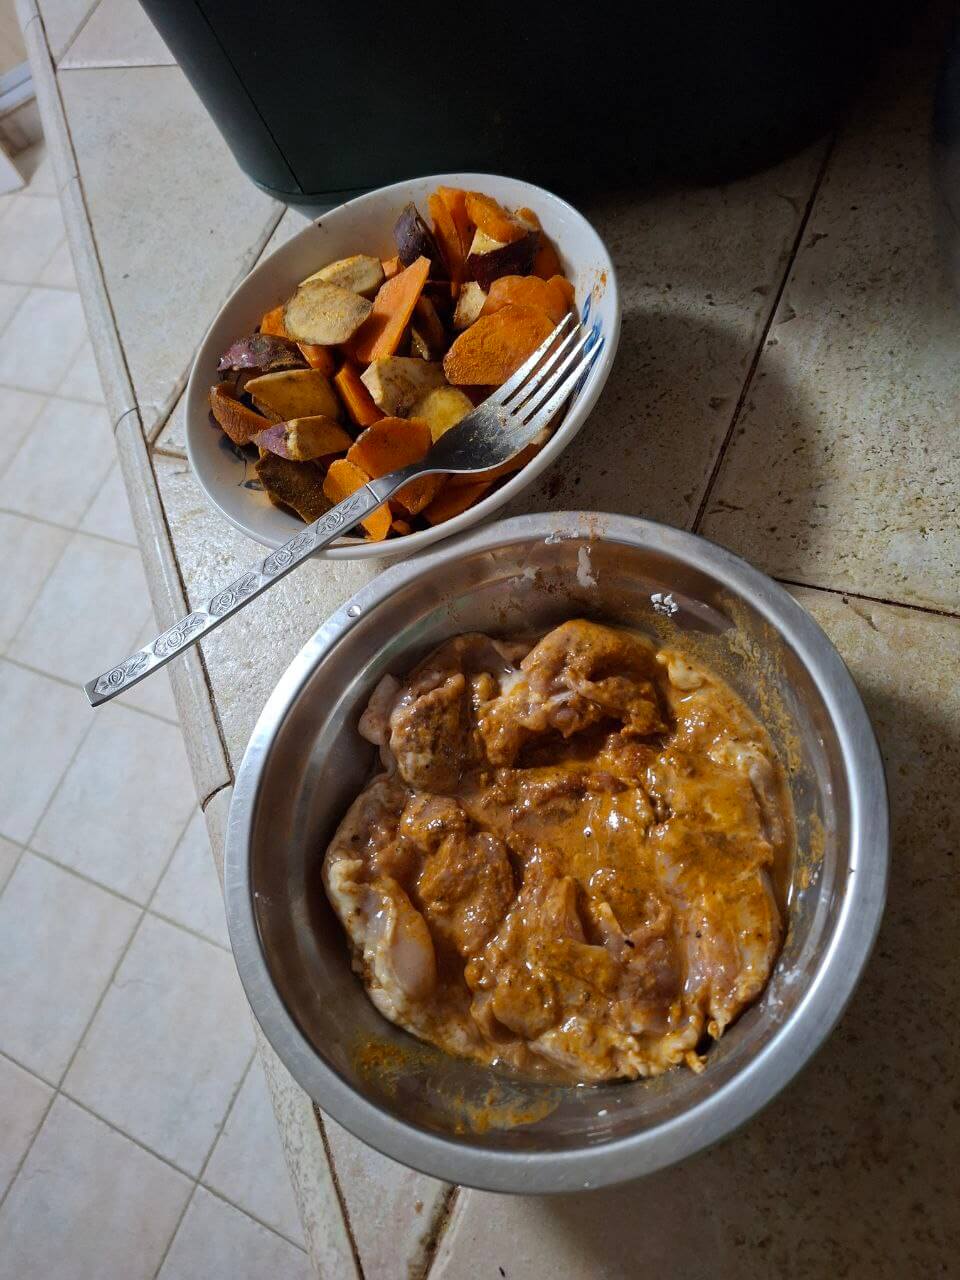
c. Marinate the Chicken Thigh and the Tough Veggie
Next, we bring out the chicken to be marinated. We have done all the work so we can just add things to marinate.
At the same time we can add stuff to the root or tough vegetables.
Okay, before you marinate, if you wish for the skin to be more crispy, pad dry the skin.
I don’t have a magic formula because as long as the chicken doesn’t taste too bad its good enough for me.
I add the following:
- Salt or MSG or some assorted salt compound (not a lot because there may be residual salt on the meat from the tenderizing. I may not add sometimes).
- Black pepper.
- Five-spice powder (two shakes).
- Tumeric powder (a few shakes).
- Curry powder (1 teaspoon).
- Corn flour (1.5 teaspoon). This is to thicken the marinate.
- Vinegar, rice wine, Shao Xing wine.
You can do #1 to #6 for the veggie but instead of #7, you need to put some oil for the veggie to prevent them from too burnt (or to make it nicer). I use olive or coconut oil.
I don’t have strong views over marinate.
Sometimes I add:
- Korean bbq sauce.
- Western bbq sauce.
- Oregano or Thyme leaves
I don’t know what I am doing!
If you have some secret formula do let me know!
Marinate this for 5 minutes.
d. Take out the Steamed Vegetables
Usually, by this time, the steamed vegetables are done but if they are not, you can do E (below) before coming back to this.
Once the timer is reached take out the steamed veggie to prevent them from overcooking.
If the color of the broccoli turns yellow, that means its overcooked and nutrients are lost.
e. Put the Chicken Thigh and Veggie in the Air Fryer.
Okay, by this time, it depends on whether the vegetables you steam is done.
If the 17 minutes is up, take care of the vegetables first because you don’t want to overcook them.
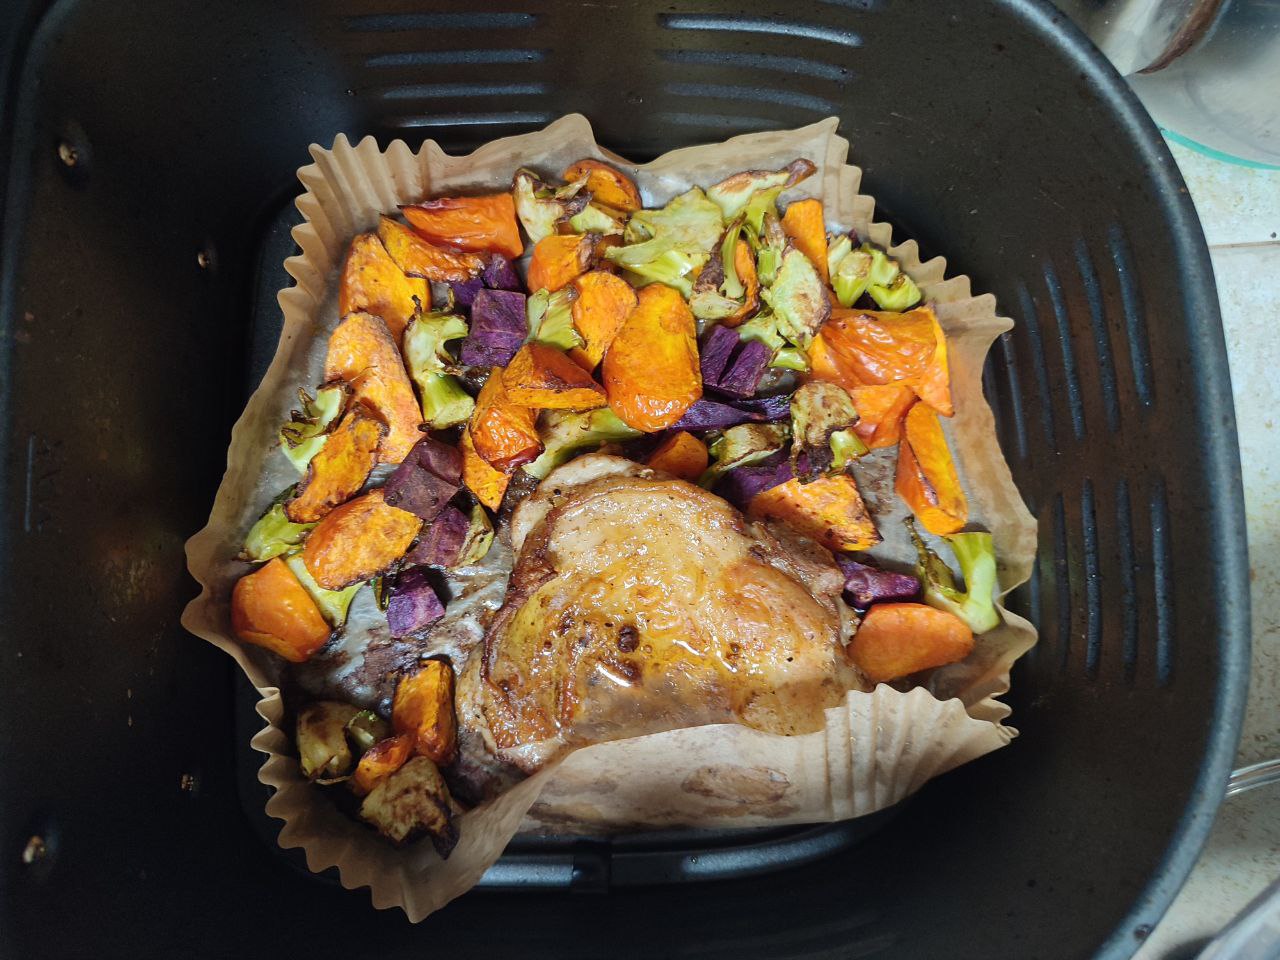
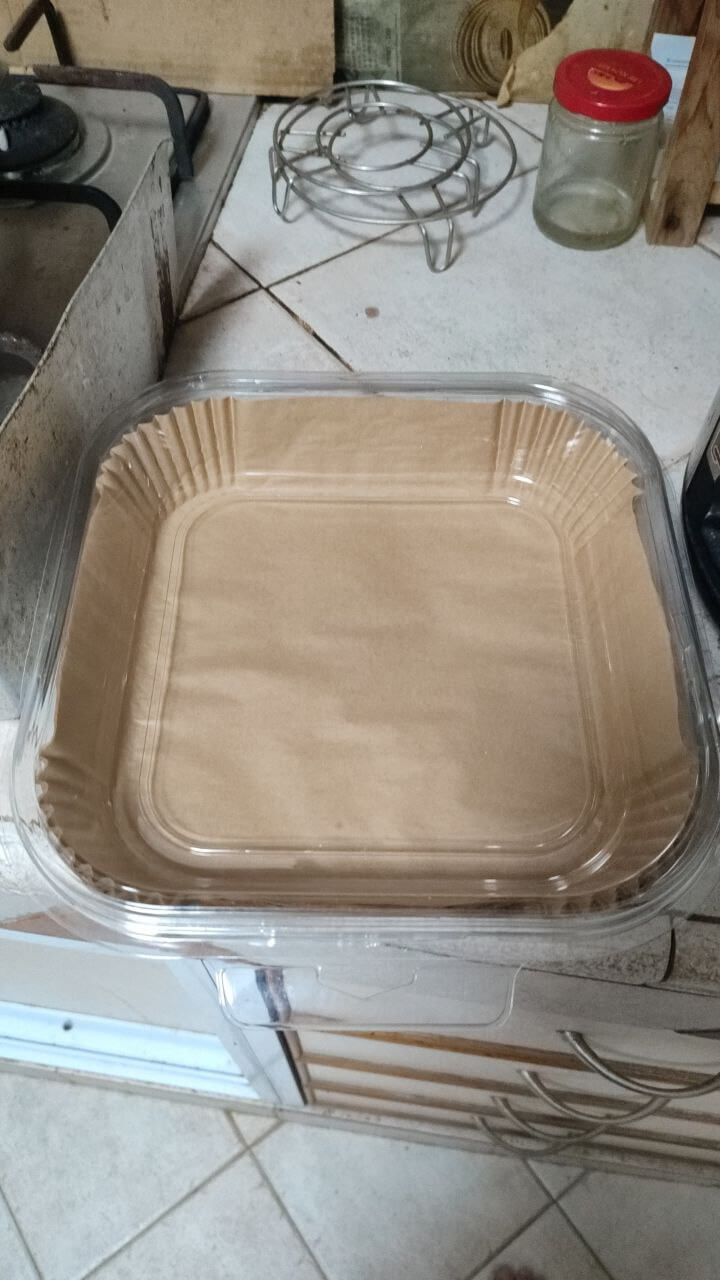
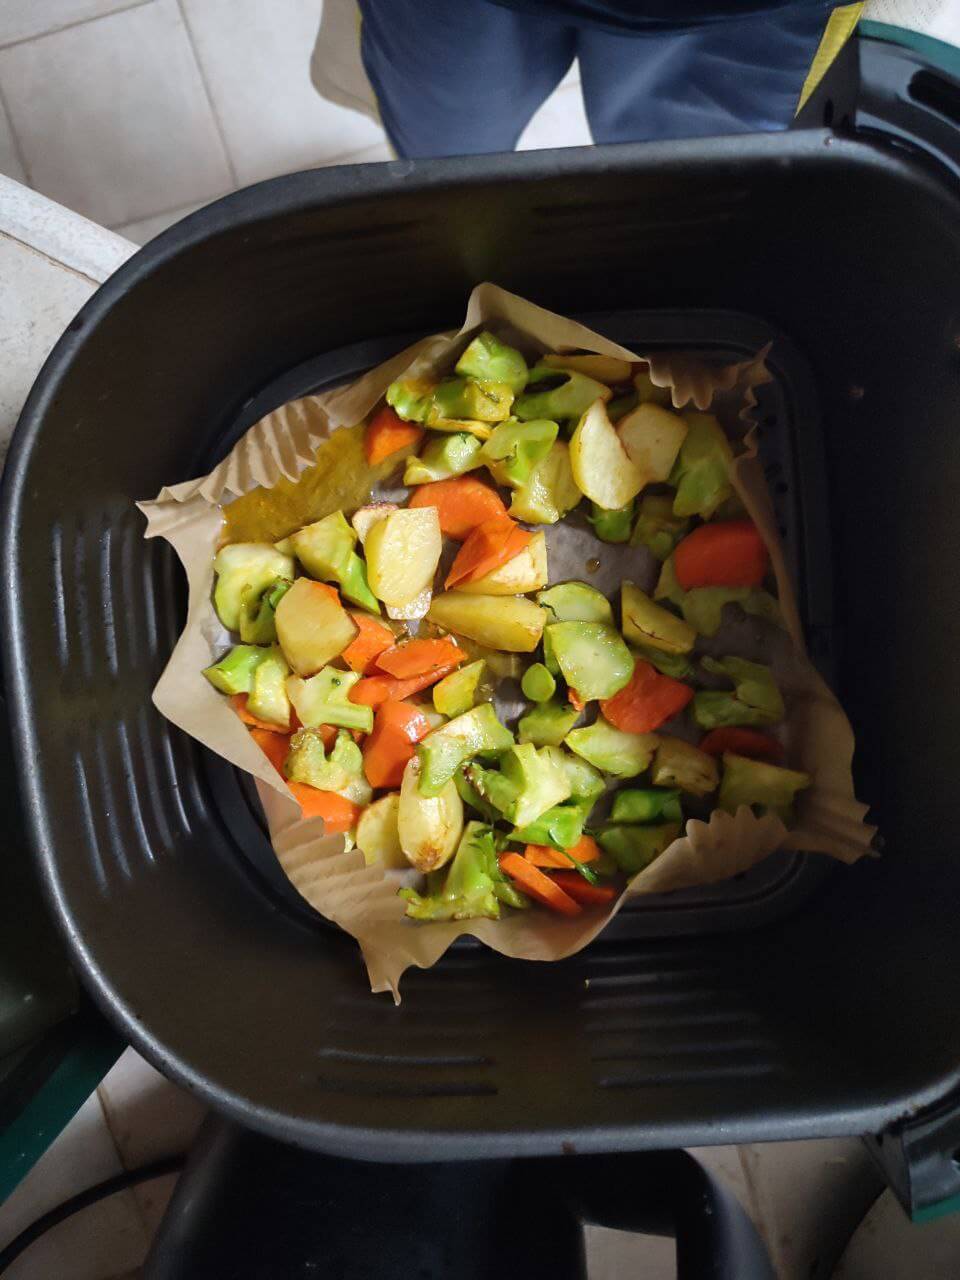
Put the chicken thigh, with the skin faced down on the baking paper. Then pour and spread the veggie around the meat.
Now, what pushed me over the edge to buy an air fryer was this promoter at NTUC. She explain to me how she use the Air Fryer.
There are things that we don’t know it exist until someone tell us.
This baking sheet is one and you can get it from Shopee for $7 for 100 pcs. That is $0.07 per day.
I will pay less than 10 cents to not have to clean my air fryer!
Okay, cooking instructions:
- Temperature: 220 degrees Celcius (usually is the highest).
- Cook 10-11 minutes.
- After time reached, flip the chicken thigh over and mixed the veggie around.
- Cook 8 minutes.
- Take out the chicken thigh.
- Lower temperature to 160-180 degrees Celcius and cook the veggie for 7-8 more minutes.
You will get something like the first picture.
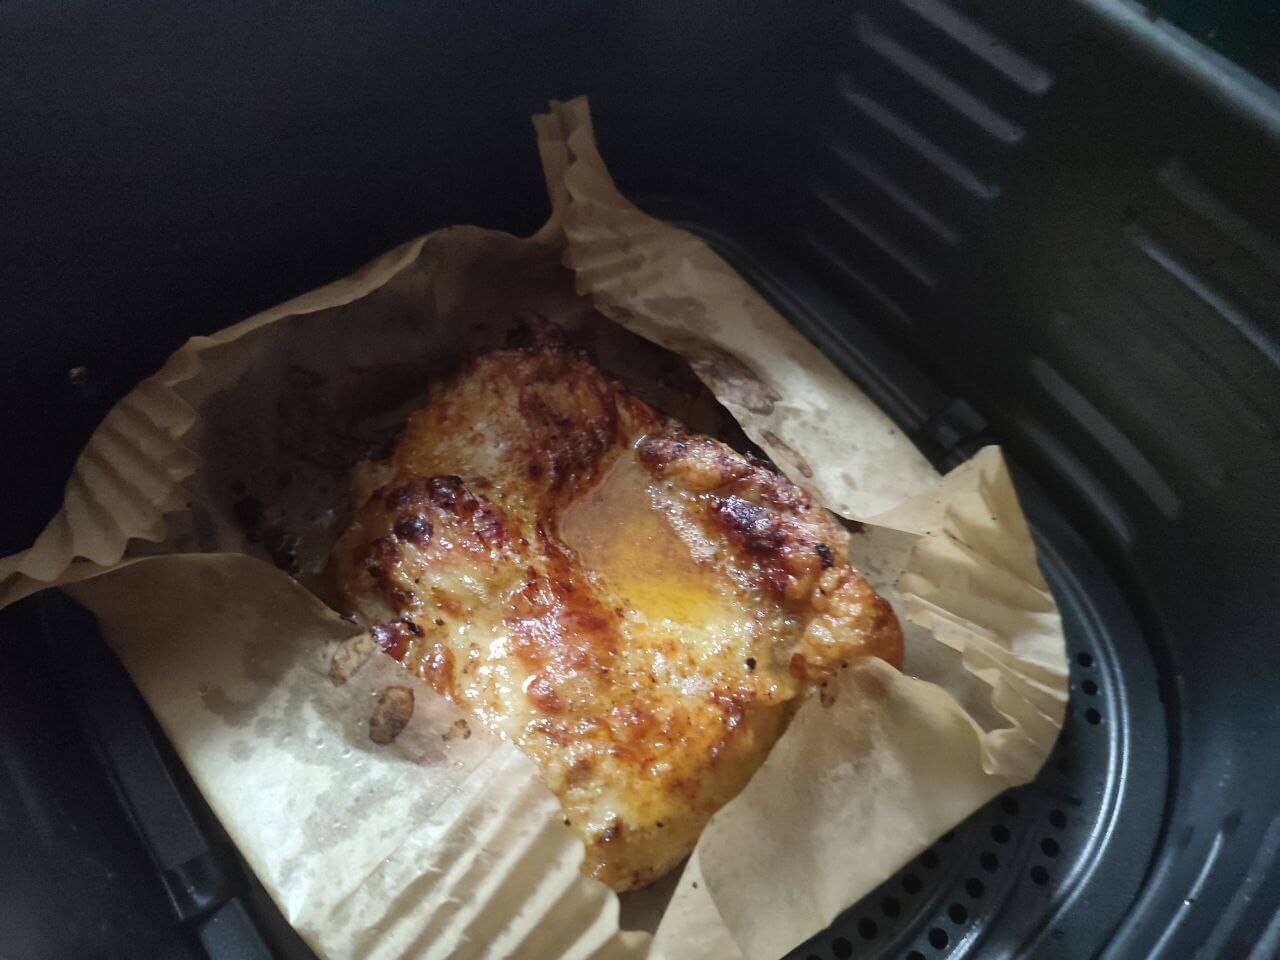
If the chicken is standalone, it will look like this.
f. Cook the Carbs
Depending on what kind of carbs you cook, they might be faster or longer.
Nowadays I cook rolled oats (rolled not instant oats) which can be pretty fast.
Note: A couple of years ago, as part of our annual Providend health initiative, the whole company attached a blood sugar monitoring device on us for two weeks. The device can tell us whether our blood sugar can spike due to what we eat. So what we realize is that white and even brown rice spiked the blood sugar and if you wish to eat carbs that don’t spike so much basmatic rice, rolled oats, tung hoon are good alternatives. You may read more in this post: I Tracked My Blood Glucose for 14-Days 24/7. What I Found Out About My Glucose Tolerance
I will start cooking after setting the Airfryer to cook the chicken thigh and veggie during the first 10-11 minutes.
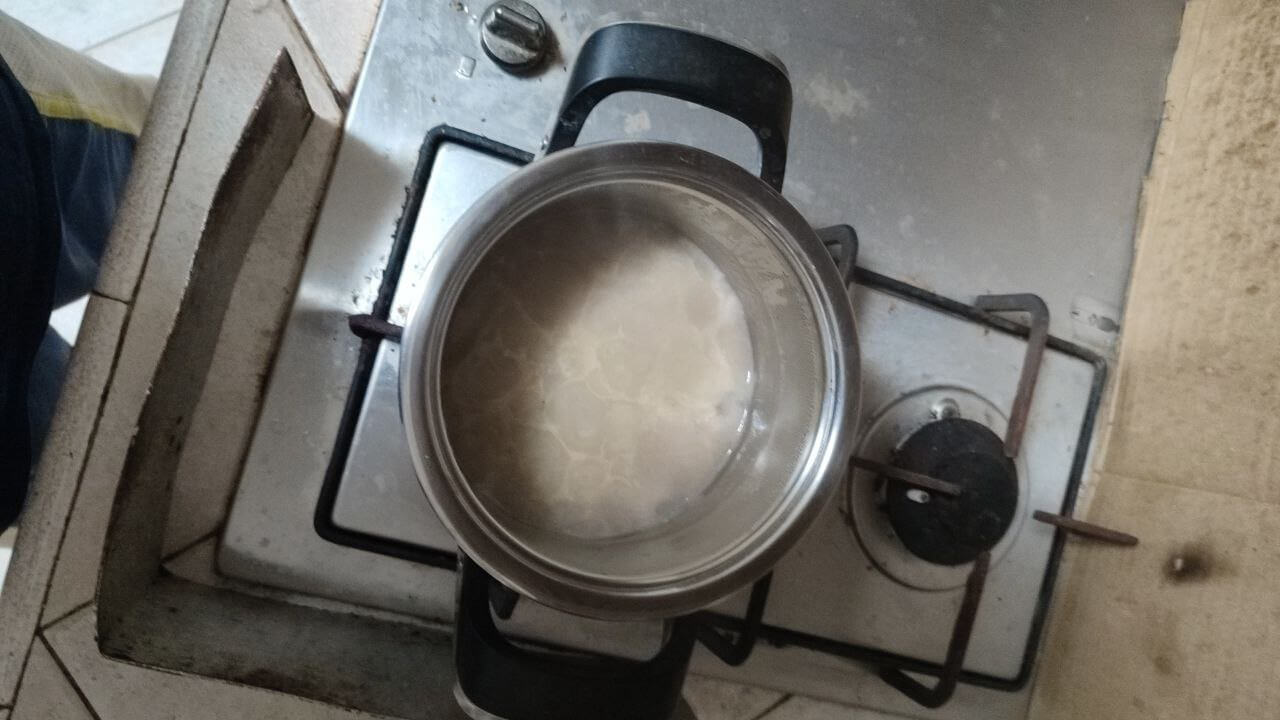
- Measure 1 cup of rolled oats or rice and add them to the pot.
- If you have already have some cooked beans that you store in the fridge, you can add them now.
- Measure and add water to the oat/rice:
- Oat: about 1.25 times the cup.
- White rice: about 1 times the cup.
- Red/Brown rice: about 2 times the cup.
- Add some salt.
- Bring the water to a boil.
- The water comes to a boil pretty fast if you put the lid on (be careful if not it will overflow easily!)
- After boiling, turn down the heat.
- Stir the stuff around.
- If you want eggs, crack and add them here.
- Cover the lid.
- Cooking time:
- Oat: 5 minutes after boil.
- Rice: 16-17 minutes after boil.
- Once done, turn off the heat, and let the stuff sit for 10 minutes. This 10 minutes more important for rice.
- Before putting into container:
- Flavor with white pepper
- Flavor with sesame oil.
So this turn out to be the fastest to prepare but I think not everyone like to eat oats.
g. Arrange the foodstuff.
We are near the end and what is left is arranging the food.
I tend to have the chicken thigh, and some veggie in one bowl and and the other bowl an all veggie meal. You might want to split evenly.

h. Cleaning Up
I tried to optimized so that there isn’t too much to clean up:
- 2 bowl to marinate the chicken and veggie.
- 1 small cooking pot.
- The steaming tray.
- A pair of fork and spoon. You can replace this with a silicone thong as well.
The reason the rice cooker is better is because cleaning up is easier than an electric steamer because the pouring away and how you dry it is a bit challenging.
Using baking sheets do dramatically reduce the cleaning.
Heating Up the Lunch.
I would usually eat the all veggie set for breakfast so this means it should still be hot when I arrive at the office.
I will heat up the food for lunch but usually it is not too cold.
Setting the timer of 1 minute 20-40 sec in our old Microwave oven will be adequate.
How Much Does the Daily Meal Prep Cost?
Finally, the cost element.
I tabulated in the table below the items that usually go into one meal and how much it cost:
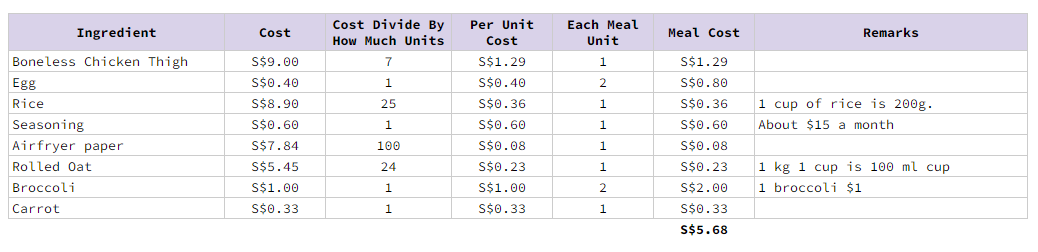
I had to make some estimates.
The seasoning will typically work up to $15 a month but from my observation, most stuff last like 3 months. It will include salt, tumeric, five-spice powder, curry powder, paper towel, olive oil, corn starch. You can imagine paying $45 for three month’s supply.
By being mostly standardized, it allows us to review the baseline cost.
Most of my meals don’t include all of these all the time but if we take out one carb, it would usually work out to be about $5.30 daily.
If I don’t eat eggs that day it falls to $4.50 daily.
I can compare this to the daily essential meal cost of $12 a day for two times six dollar meal. (You might be interested to read my most essential lifestyle). Here is the table again:
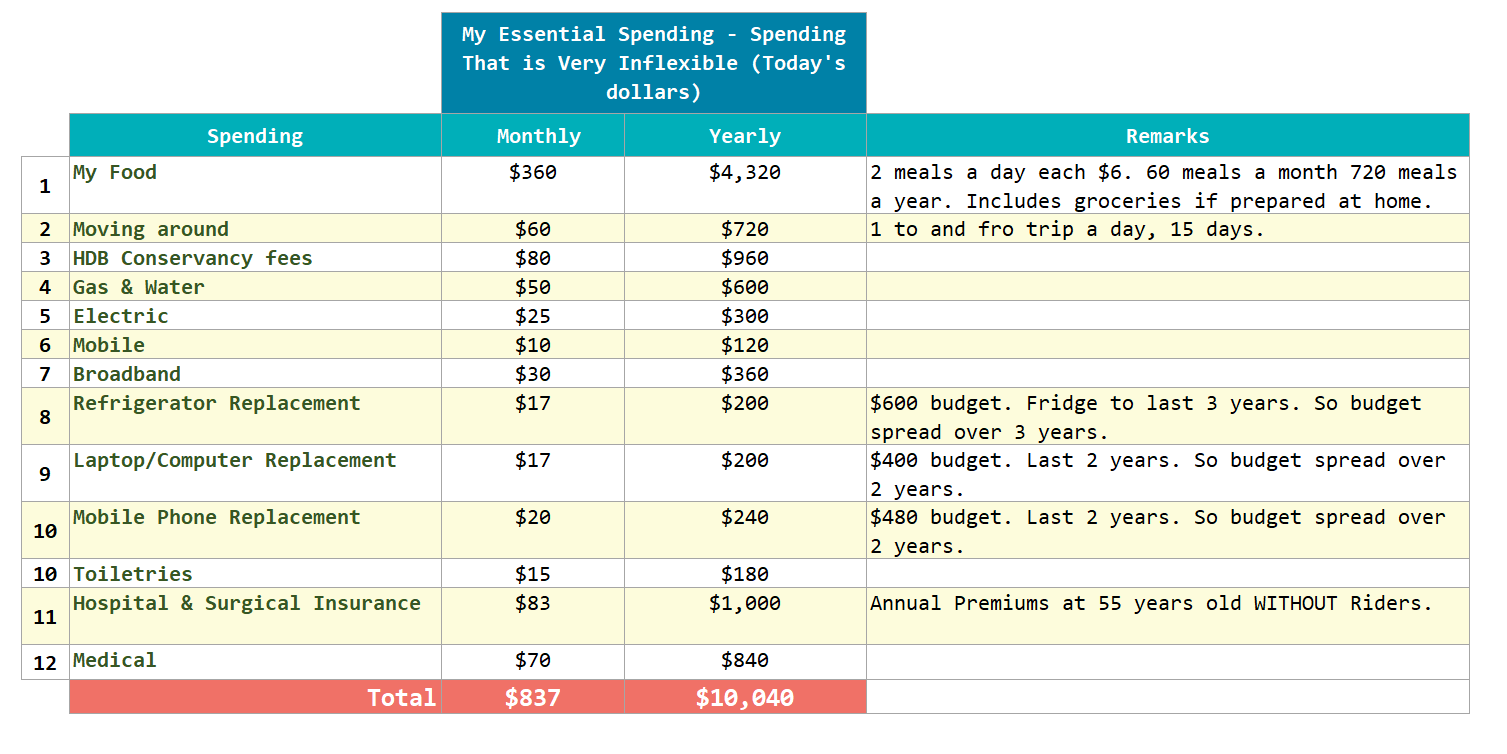
Meal prep allows me to see what is realistic and the possibility of cutting down the food cost even further. If we work out 20 work meals and 10 meals that are less constrained, the monthly spending becomes $5.30 x 20 +$12 x 10 = $226 monthly. If it is 30, then it becomes 160 monthly.
I am not gonna reduce the food cost because I would like to have some slack in case I cannot cook and I need to get the food from somewhere.
Trying to cook myself in a sustainable manner allows me to find out if this $12 a day is too constrained, just right, or can go down further.
Food makes up almost 45% of my most essential spending.
Some Reflective Thoughts After Cooking for a While
If you do something for a period, you are bound to have some thoughts about it. Here are some thoughts.
1. I don’t think this is the meal prep some envision that they wish to learn.
If I see an article or a video about meal prep, I wish to see a video about how we prepare a variety of meals over the weekend, saving us a lot of repetitive cooking during the week days.
If you read until this point, you will realize this is not one of those because of what I want to prepare.
You may be disappointed but this is te way it is. If you are able to teach me how to prep vegetables over the weekend and heat it up during the weekdays I am more than happy to listen.
2. You may not need to do such elaborate meal prep and cooking.
When I restarted this, I just set myself a simple goal: Marinate and air fry chicken thigh.
If you just zoom into my chicken thigh meal prep, you will realize the whole thing is quite passive:
- Defrost in the fridge.
- Tenderize takes about half an hour each week.
- Marinate for 5 minutes.
- Cook for 18 minutes.
There is ample room for you to take a break if you start small.
If we are very clear about what we want, for example, to save time, keep cost low, you may be able to find your sweet spot.
It doesn’t have to be similar to me.
3. The trick is learning about the critical things that make things work.
I would share with people that in many disciplines, if we manage to figure out certain factors that are critical to influence the discipline and focus on them, we won a big part of the battle.
In cooking, there may be some, and I am trying to be particularly attentive to them:
- Some vegetables or stuff take longer to cook. What are they and usually how should we cook them?
- If you mentally or have a quick reference how long it takes to cook something, at what kind of heat, you should do pretty decent (well perhaps the second or third time).
- How do we tell if something is about to cook?
I am sure you have some advise for me here. My mom and dad always have an intuition when food is done to a certain degree but they would struggle to explain to me. I think there will be people who can articulate this better than me.
4. Improvision.
#3 is important because there is a lot of improvising.
It is also during improvising that we learn better.
There might be some days where you need a quick meal but you are lazy to prepare.
The difference between buying or choosing to cook is how significant is the resistance such as how big of a chore is it to cook.
The moment you do it so much until it becomes more second nature, the less resistance you develop.
5. “You can Air Fry Eggs”
I know for sure what I did was not the most efficient because I am always surprised by the things we can do with less equipment or more expensive equipment.
I wondered if we can air fry eggs until our content lead Amelia shared how we can do it.
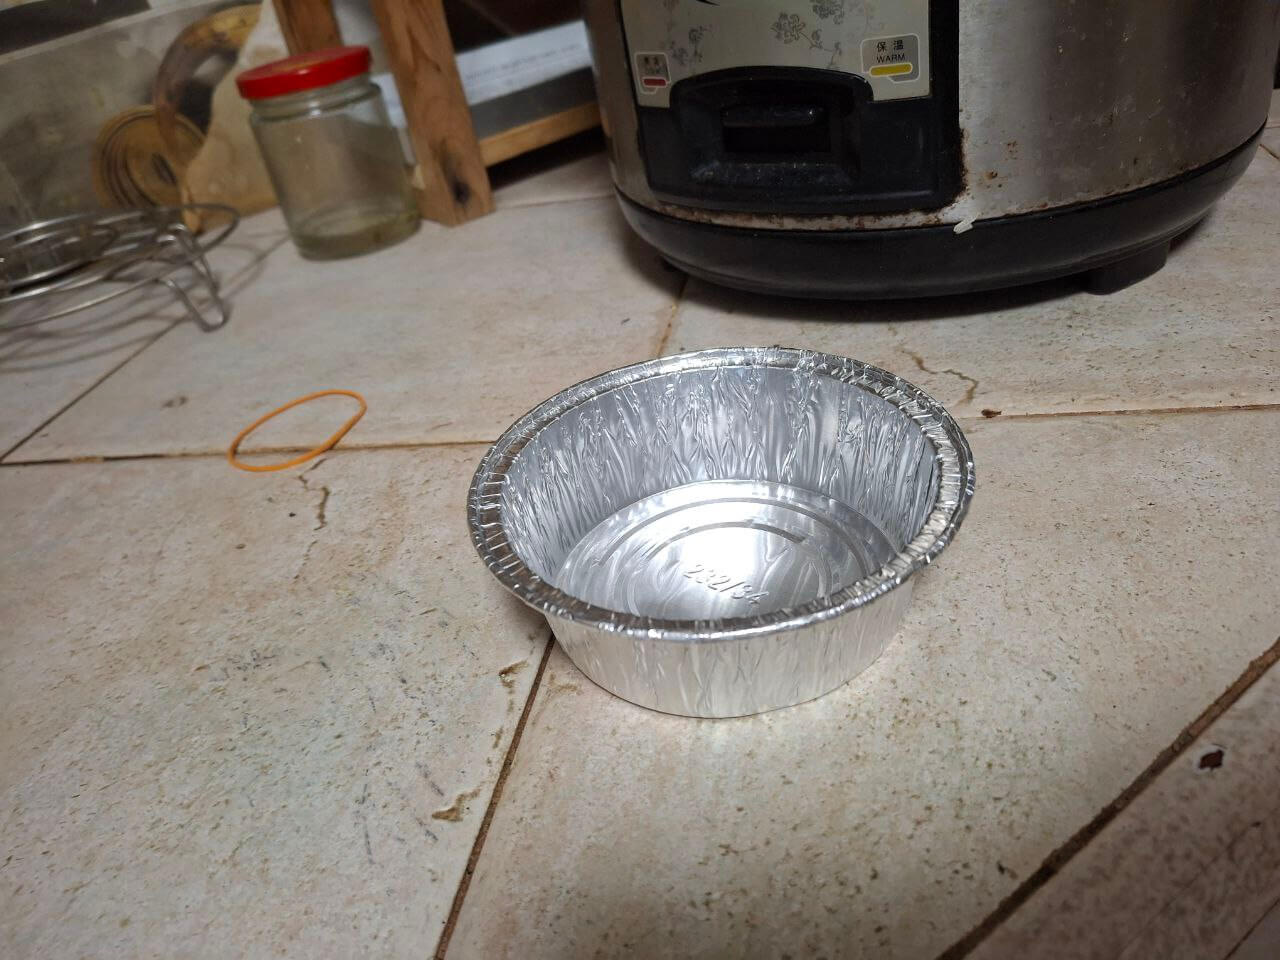

We can use some of these aluminum bowl to put the eggs in and air fry it.
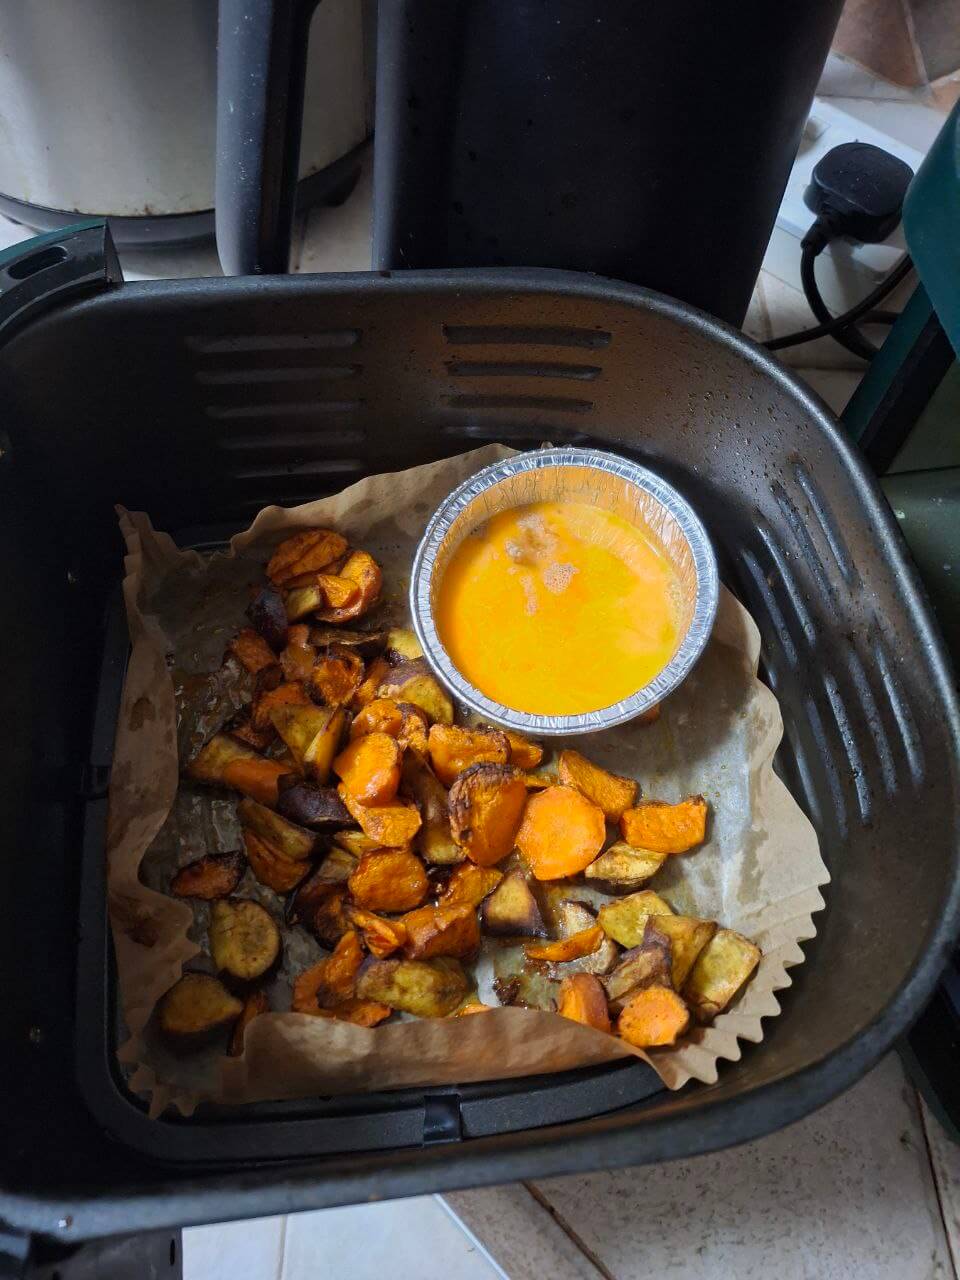
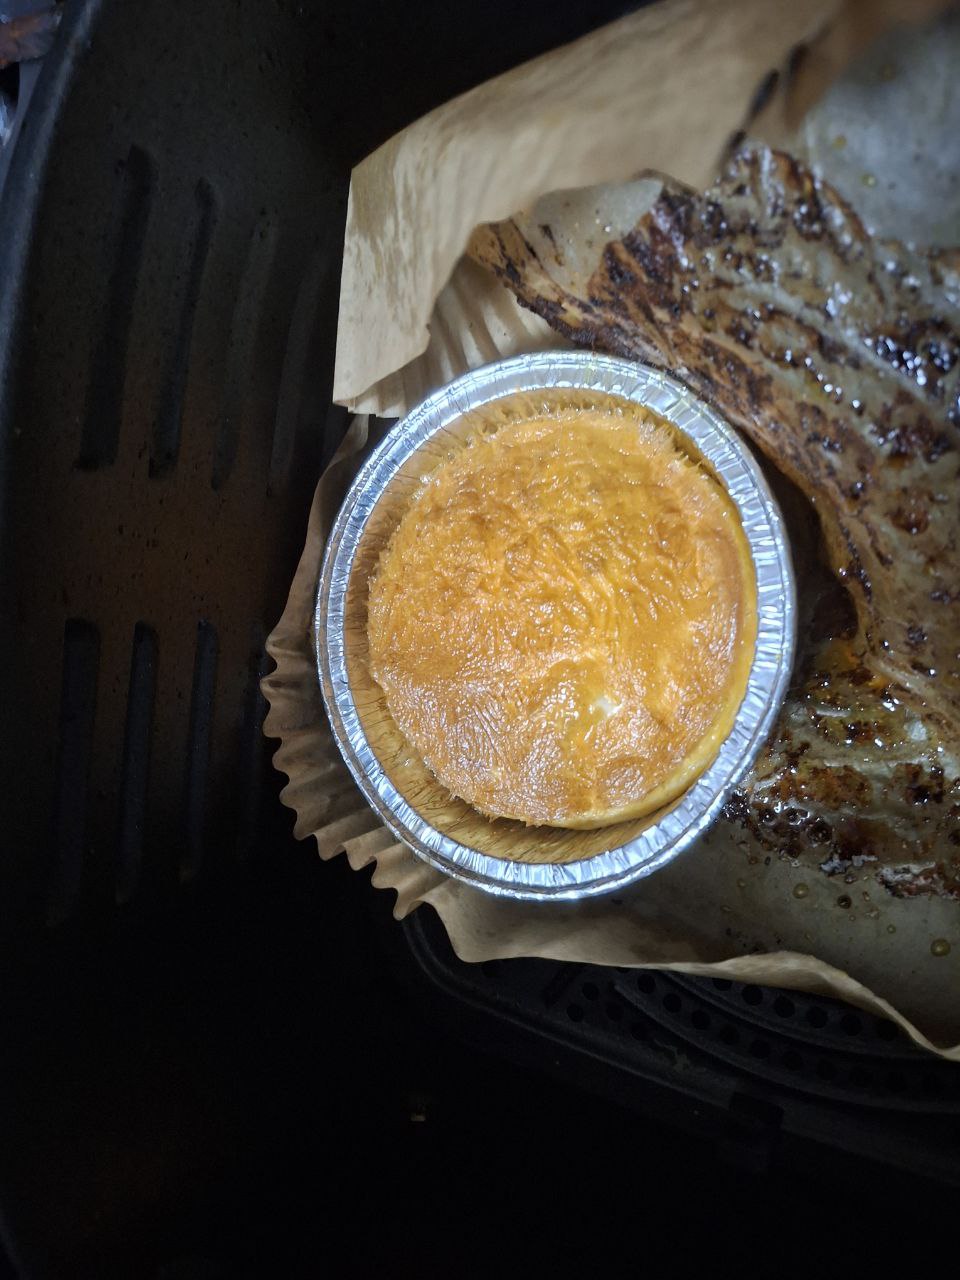
I think unless I add some cheese and greater flavoring, I don’t like making eggs in this form.
However, I am sure that there are some more undiscovered sweet spots that I would know after learning more from others.
6. A Sustainable Meal is a More Realistic Meal
If we try to cut too many corners, then we end up with a meal system that does not fit our needs:
- If it does not make me feel satiated, I will end up going to find something else to eat.
- If I spend too long or too much effort preparing for it, I might as well just buy something to it.
- If I stick to something consistently but I find it too boring, then that would be a problem.
I try to make sure that what I do can satisfy the above and if it is sustainable then this can continue for longer.
Equipment Required.
To cook or meal prep, having the right equipment helps. Especially if we are trying to save time.
Here are a few that I use that I find that it is necessary:
- Silicone Thongs – good for stir fry, mixing things and doing all sorts of stuff. Ideal if you want to use something for all the stuff instead of using multiple items.
- Rice cooker with steaming tray.
- Air Fryer large.
- Some pots.
- Frying pan.
- Bowls.
- Small pail or basin to help wash vegetables.
- Salt and pepper dispenser.
- Smart watch – Those $60-70 watch with some smart functionality. I didn’t realize how useful until I start setting timers.
- More than one glass lunch box – Microwave friendly so you can hit up the food. Having more is better because sometimes you cannot fit them into one box.
Feedbacks are Welcome
That is the end of my sharing.
I am sure it might look stupid to some more experience cooks but this is what it is.
If you have better suggestions do send to me.
I think I will be sharing here and there some more of my meal prep experience if you are interested. They will definitely be shorter than this.
If you want to trade these stocks I mentioned, you can open an account with Interactive Brokers. Interactive Brokers is the leading low-cost and efficient broker I use and trust to invest & trade my holdings in Singapore, the United States, London Stock Exchange and Hong Kong Stock Exchange. They allow you to trade stocks, ETFs, options, futures, forex, bonds and funds worldwide from a single integrated account.
You can read more about my thoughts about Interactive Brokers in this Interactive Brokers Deep Dive Series, starting with how to create & fund your Interactive Brokers account easily.
Kyith is the Owner and Sole Writer behind Investment Moats. Readers tune in to Investment Moats to learn and build stronger, firmer wealth foundations, how to have a Passive investment strategy, know more about investing in REITs and the nuts and bolts of Active Investing.
Readers also follow Kyith to learn how to plan well for Financial Security and Financial Independence.
Kyith worked as an IT operations engineer from 2004 to 2019. Currently, he works as a Senior Solutions Specialist in Insurance Start-up Havend. All opinions on Investment Moats are his own and does not represent the views of Providend.
You can view Kyith's current portfolio here, which uses his Free Google Stock Portfolio Tracker.
His investment broker of choice is Interactive Brokers, which allows him to invest in securities from different exchanges all over the world, at very low commission rates, without custodian fees, near spot currency rates.
You can read more about Kyith here.